引言 这是 TheCherno 的 OpenGL 系列教程。关于这个系列,我在 GitHub 和码云上自建了源码仓库,如果有需要的朋友可以去看看。
欢迎来到OpenGL
在这个视频中,主要包括 OpenGL 实际是什么、怎么使用它以及它能为我们做什么和它不是什么等等,这个系列也是如此。
什么是OpenGL 首先如果你听过 OpenGL 但不确定它是什么,你可能想到与图形有关的,那就是 OpenGL。OpenGL 是一种图形接口,现在 API 代表应用程序接口,基本上就是一大堆我们能够调用的函数去做一些事情。在这种情况下,由于 OpenGL 是一种图形 API,它允许我们做一些与图形相关的事情,特别的是它允许我们访问 GPU 也就是显卡,图形处理单元(Graphics Processing Unit)。
调用显卡也更好地绘制图形,所以实际上为了利用电脑或其他设备(比如手机)中强大的图形处理器,需要调用一些 API 访问固件。OpenGL 正好是允许访问和操作 GPU 的许多接口中的一种,当然我们也有一些其他的接口,比如 Direct3D、Vulcan 和 Metal 等等,所以某种角度来说 OpenGL 允许我们控制显卡。
关于OpenGL误解 让我们来澄清一些人关于 OpenGL 的误解。
首先,许多人称它为一个类库或一种引擎或一些其他的框架,但这些都不是。OpenGL 核心本身只是一种规范,和 CPP 规范差不多。实际上它没有确定任何代码和类似的事情本身就是规范,比如“嘿,这个函数应该存在,需要这些参数并且返回这个值”,它只是一种你能利用这种 API 做什么规范,没有任何具体的实现,这意味它绝不是一个类库,因为 OpenGL 本身没有代码,它只是一种规范。
去哪儿下载 OpenGL 是另一个常见的问题。
然而,答案是你不需要真的去下载 OpenGL,它本身只是一种规范。那么,谁去实现它呢,谁去为你调用的 OpenGL 函数写代码呢?这个答案是 GPU 制造商,所以如果你使用的是 NVIDIA 显卡,那么你的显卡驱动(也就是 NVIDIA 驱动)实际上包含了 OpenGL 的实现,每个显卡制造商比如 AMD、Intel 等都会有它们自己的实现,每家关于 OpenGL 的实现都会有些不同,这也就是有些游戏能在 NVIDIA 驱动的显卡上运行但在一个 AMD 电视或者其他显卡设备上运行有些区别、甚至会出现问题的原因。
但不管怎么说,关键在于你的显卡制造商实现的 OpenGL,这又可能导致下一个有关 OpenGL 常见的误解:它是开源的。我不知道人们为什么会这么觉得,也许是名字中带着“Open”,但是它根本不是开源的,你看不到 OpenGL 的源码,因为首先它是由 GPU 制造商实现的,它们肯定不会发布它们的驱动源码。
OpenGL 提供了什么能激发和导致许多人不幸地说 OpenGL 是无与伦比的?原因在于它是跨平台的,所以你的 OpenGL 代码可以在 Windows、Mac、Linux 和 Android 上正常执行,以至于人们立马就会意识到 OpenGL 比 Direct3D 更优越,因为它能在所有平台上运行,但是请不要这么说。
从我 EA 技术中心并处理过许多引擎中图形接口的经验来看,因为 OpenGL 是跨平台的 API,而制作一款游戏不会只涉及实现一个独立的图形 API。如果游戏引擎是跨平台的,那意味着它不仅实现了 Xbox,也包括其他一些平台,它们不得不实现大量其他的图形接口。
因此,我们面临的问题是图形 API 是为特定平台设计的。例如 Direct3D 是微软为 Windows 设计的,它在 Windows 上的表现要比跨平台的 API 好些。现在请记住,实际编写这些代码的人不是微软,即使微软的确为了更好的代码质量和 GPU 制造商合作过。所以关于 API 的比较是没有任何意义的,因为通常平台原生的东西会更健壮更友好。
就 OpenGL 的复杂性而言,它可以说是现在可以学习的最简单的 API 了,所以 OpenGL 是绝对值得学习的。Vulkan 是另一个跨平台的 API,但它更底层更严谨,不适合初学者直接入门,老实说我并不想使用 Vulkan 去开发游戏,OpenGL 更加稳定。
传统与现代OpenGL 另外本系列学习的主要是现代 OpenGL。OpenGL 于 90 年代发布,那时的情况和现在大不相同,那时的 GPU 是可编程的,十分灵活,制造商给了程序员和开发者更多的控制权。
传统 OpenGL 和现代 OpenGL 之间最大的区别就是着色器。如果你对图形学感兴趣的话可能听说过着色器,它可能有点像 shadow 这个单词或者是光源,有些人将它和光源或其他比较。抛开这些,着色器是程序,它是在你 GPU 上运行的代码,这就是着色器,它是在你 GPU 上运行的一段程序。。
那么如果你用 C++、Java 或 C# 或不管什么语言写代码,这段代码都会运行在你的 CPU 上。但当我们开始处理图形的大部分时间里,我们想要更为精确的控制显卡运行,可能要将大部分代码从 CPU 转到 GPU 上,因为它在 GPU 上运行更快,这就是着色器存在的意义:允许我们在 GPU 上运行代码。所以可编程的着色器是最大的区别。
设置OpenGL和C++中创建一个窗口
上一节我们只说了 OpenGL 到底是什么以及这个系列实际会讲什么。今天我们的任务是让我的操作系统为我创造一个窗口,在未来我们可能会在窗口内绘制图形。
我们会使用一个向我提供窗口创建和窗口管理的实际代码类库,不管 Windows、Mac 还是 Linux。GLFW 就是满足上述条件的类库,我喜欢这个类库的原因是它确实是一个轻量级类库,它虽然不如 SDL 那么全面(实际上它就是个渲染器),但依然可以创建窗口、OpenGL context 以及给我们访问一些类似输入之类的基础东西。
下载类库 由于我使用的是 Mac,所以使用 brew 下载:
1
2
brew install glew brew install glfw
下载后默认的路径为 /usr/local/Cellar/。
配置CMake文件 我将项目名称设置为 OpenGL,在 CLion 中配置:
1
2
3
4
5
6
7
8
9
10
11
12
13
14
15
16
17
18
19
20
21
22
cmake_minimum_required (VERSION 3.16 )project (OpenGL)set (CMAKE_CXX_STANDARD 17 )set (GLEW_H /usr/local/Cellar/glew/2.2 .0 _1/include /GL)set (GLFW_H /usr/local/Cellar/glfw/3.3 .7 /include /GLFW)include_directories (${GLEW_H} ${GLFW_H} )set (GLEW_LINK /usr/local/Cellar/glew/2.2 .0 _1/lib/libGLEW.2.2 .dylib)set (GLFW_LINK /usr/local/Cellar/glfw/3.3 .7 /lib/libglfw.3 .dylib)link_libraries (${OPENGL} ${GLEW_LINK} ${GLFW_LINK} )set (SOURCE_FILES main.cpp)add_executable (OpenGL ${SOURCE_FILES} )if (APPLE) target_link_libraries (OpenGL "-framework OpenGL" ) target_link_libraries (OpenGL "-framework GLUT" ) endif ()
编译项目 复制下面内容到 main.cpp:
1 2 3 4 5 6 7 8 9 10 11 12 13 14 15 16 17 18 19 20 21 22 23 24 25 26 27 28 29 30 31 32 33 34 35 36 37 38 #include <glew.h> #include <glfw3.h> #include <iostream> using namespace std;int main () if (!glfwInit ()) return -1 ; GLFWwindow* window = glfwCreateWindow (640 , 480 , "Hello World" , NULL , NULL ); if (!window) { glfwTerminate (); return -1 ; } glfwMakeContextCurrent (window); while (!glfwWindowShouldClose (window)) { glClear (GL_COLOR_BUFFER_BIT); glfwSwapBuffers (window); glfwPollEvents (); } glfwTerminate (); return 0 ; }
运行代码,我们会得到一个黑色的窗口。
画一个三角形 下面我们用传统 OpenGL 设定三个顶点,绘制一个三角形:
1
2
3
4
5
6
7
8
9
10
11
12
13
14
15
16
17
18
19
20
21
22
23
24
25
26
27
28
29
30
31
32
33
34
35
36
37
38
39
40
41
42
43
44
45
#include <glew.h> #include <glfw3.h> #include <iostream> using namespace std; int main() { /* Initialize the library */ if(!glfwInit()) return -1; /* Create a Windowed mode and its OpenGL context */ GLFWwindow* window = glfwCreateWindow(640, 480, "Hello World", NULL, NULL); if(!window) { glfwTerminate(); return -1; } /* Make the window's context current */ glfwMakeContextCurrent(window); /* Loop until the user closes the window */ while(!glfwWindowShouldClose(window)) { /* Render here */ glClear(GL_COLOR_BUFFER_BIT); + glBegin(GL_TRIANGLES); + glVertex2f(-0.5f, -0.5f); + glVertex2f( 0.0f, 0.5f); + glVertex2f( 0.5f, -0.5f); + glEnd(); /* Swap front and back buffers */ glfwSwapBuffers(window); /* Poll for and events */ glfwPollEvents(); } glfwTerminate(); return 0; }
在C++中使用现代OpenGL
顶点缓冲区和在现代OpenGL中画一个三角形
现代 OpenGL 比那种传统 OpenGL 更具可编程性,它的扩展性更好也更加强大,你可以用它做许多事情,但代价是在绘制一个简单三角形前,我们实际上需要做很多设置。而前面我们已经用传统方法简单绘制了三角形,非常简单并且不需要什么设置。
让我们聊聊需要什么东西才可以绘制一个三角形。对于现代 OpenGL 而言,首先我们需要能够创建一个顶点缓冲区,然后还要创建一个着色器(之后可能会单独讲一下图形渲染管线是如何运行的,特别是 OpenGL)。让我们快速地说一下这两个东西是什么吧。
顶点缓冲区与着色器 顶点缓冲区基本上就是去掉 vertex,它只是一个内存缓冲区,一个内存字节数组,从字面上讲就是一块用来存字节的内存。但是顶点缓冲区又和 C++ 中像字符数组的内存缓冲区不太一样,它是 OpenG 中的内存缓冲区,这意味着它实际上在显卡显存(Video RAM)上。
所以这里的基本思路就是我要定义一些数据来表示三角形,我要把它放入显卡的 VRAM 中,然后还需要发出 DrawCall 绘制指令。实际上我们还需要告诉显卡如何读取和解释这些数据,以及如何把它放到我们屏幕上,一旦我们发出 DrawCall 指令,我们需要告诉显卡:好了,一旦你在显卡端获得了这些数据,我要你像这样把它摆出来,我希望你把它画出来在屏幕上给我显示一个三角形。所以我们需要告诉显卡怎么做,需要对显卡编程,这就是着色器,着色器只是一个运行在显卡上的程序,它是一堆我们可以编写的在显卡上以一种非常特殊的方式运行的代码。
听起来很复杂,但是不要想太多。简而言之我们有一个可以指定的内存,还有一些我可以指定的数据,告诉显卡:嘿,这是数据。然后从显卡那边说:好了,现在读一下这些数据并解释一下(例如屏幕上的位置),可能的话把它们连成一个三角形。这就是整件事的原理,也是 OpenGL 渲染的流程。
要注意 OpenGL 是作为一个状态机来运行的,这意味着你不必把它当作一个对象或任何类似的东西来对待,你所做的是设置一系列的状态,然后当你说一些事比如给我画一个三角形,这是非常 contextual 的。我的意思是,我不只是说,嘿,给我画一个三角形,然后传递 OpenGL 需要绘制三角形的所有东西。实际上它已经知道画三角形需要什么了,因为那是状态的一部分。
代码实践 让我们来创建这个顶点缓冲区来看看能做些什么。
1
2
3
4
5
glBegin (GL_TRIANGLES);glVertex2f (-0.5f , -0.5f );glVertex2f ( 0.0f , 0.5f );glVertex2f ( 0.5f , -0.5f );glEnd ();
这是之前使用传统 OpenGL 绘制三角形的代码。现代 OpenGL 需要创建顶点缓冲区,发送到 OpenGL 显存,然后发出一个 DrawCall 指令说:嘿,请画出我的缓冲区。
首先我们要创建自己的缓冲区,这个过程非常简单,只需要调用 glGenBuffers():
1
2
unsigned int buffer;glGenBuffers (1 , &buffer);
第一个参数指定需要几个缓冲区;第二个参数指定返回整数的内存地址,这也是生成的缓冲区的 id。记住 OpenGL 是作为一个状态机工作,这意味着你可以生成一切,而 OpenGL 中生成所有东西都分配了一个唯一的标识符,它只是一个整数,也是你实际对象的 id,当你想要使用这个对象的时候就用这个数字。
因为我要渲染我的三角形,需要说明用哪个缓冲区来渲染三角形,只需要传递这个整数即可。现在我们有了这个 id,一旦创建缓冲区后,我们现在就要选择那个缓冲区。选择(Selecting)在 OpenGL 中被称为绑定(Binding):
1 glBindBuffer (GL_ARRAY_BUFFER, buffer);
下一步是指定数据。一个简单的方式是在声明数据的时候直接把顶点数据填充进去:
1
2
3
4
5
float position[6 ] = { -0.5f , -0.5f , 0.0f , 0.5f , 0.5f , -0.5f };
接着调用 glBufferData() ,查阅文档:
1 glBufferData (GL_ARRAY_BUFFER, 6 * sizeof (float ), positions, GL_STATIC_DRAW);
很好,现在我们为 OpenGL 指定了 positions,通常还需要创建一个索引缓冲区,也都是后话了。不过我们还没有着色器,去解释如何用这些数据进行绘制,我们将在下一期讨论那个问题。今天我们要做的只是想看看能不能把它绘制出来。
在没有索引缓冲区的情况下我们可以调用 glDrawArrays() 绘制指定图元:
1
2
3
4
5
6
7
8
9
10
/* Render here */ glClear(GL_COLOR_BUFFER_BIT); -glBegin(GL_TRIANGLES); -glVertex2f(-0.5f, -0.5f); -glVertex2f( 0.0f, 0.5f); -glVertex2f( 0.5f, -0.5f); -glEnd(); +glDrawArrays(GL_TRIANGLES, 0, 3);
我喜欢用 Photoshop 打比方。如果我选择一个图层,然后在该图层上用画笔绘制一些东西,它只会影响这一图层。然而如果我没有选择任何东西或者选错了东西,它不会影响到我想绘制的那个图层。OpenGL 也是一样,在使用它之前你需要选择或绑定所有东西,因为这就是它的运行原理,它是上下文相关的,它是一个状态机。
OpenGL中顶点的属性和布局
上一节我们讨论了顶点缓冲区,但实际上有一些部分我们忽略了:顶点属性和着色器。今天我们将学习顶点属性。
顶点属性 所以什么是顶点属性?OpenGL 渲染管线的工作原理是我们为我们的显卡提供数据,我们在显卡上存储一些内存,它包含了我们想要绘制的所有数据;然后我们使用一个着色器在显卡上读取数据,并且完全显示在屏幕上。
通常我们绘制几何图元的方式就是使用一个叫顶点缓冲区的东西,也就是一个存储在显卡上的内存缓冲区,所以当对着色器编程时实际上是从读取顶点缓冲区开始的,它需要知道缓冲区的布局,这个缓冲区包含的浮点数指定了每个顶点的位置、纹理坐标、法线之类的。
代码实践 1 2 3 4 5 float position[6 ] = { -0.5f , -0.5f , 0.0f , 0.5f , 0.5f , -0.5f };
在我继续之前想先定义顶点是什么意思,因为人们在错误的使用这个词。
顶点与位置无关,顶点就是几何图形上的一个点。大多数人在视觉上对它们的明显印象是通过它的位置,所以如果我给你画一个三角形,你会看到三个顶点。但顶点不是位置,一个顶点可以不仅仅包含一个位置,顶点可以包含位置更多的数据例如纹理坐标、法线、颜色等等,它们可能都在一个顶点。所以我们需要告诉 OpenGL 外面的数据布局,调用 glVertexAttribPointer() 函数。
index:Specifies the index of the generic vertex attribute to be modified.
基本上我们的着色器读取所有这些的方式是通过索引。一般来说如果我们有一个位置在索引 0 处,我们需要把它作为索引 0 来引用;而当我们有三种属性,我想让我的位置在下标 0,纹理坐标在索引 1,法线在索引 2.所以当我开始从着色器和显卡读取数据时,然后进入那个缓冲区,我可以简单地引用它们。这就是索引,它只是缓冲区实际属性的索引。
size:Specifies the number of components per generic vertex attribute. Must be 1, 2, 3, 4. Additionally, the symbolic constant GL_BGRA is accepted by glVertexAttribPointer. The initial value is 4.
这里的 size 可能有点误导人,它是每个通用顶点属性的组件数,只能是 1,2,3,4。所以这个 size 和字节没有关系,和它们实际占用了多少内存也没关系。在本例中每个顶点的坐标有 x 和 y 两组分量,所以 size 为 2。
type:Specifies the data type of each component in the array. The symbolic constants GL_BYTE, GL_UNSIGNED_BYTE, GL_SHORT, GL_UNSIGNED_SHORT, GL_INT, and GL_UNSIGNED_INT are accepted by glVertexAttribPointer and glVertexAttribIPointer. Additionally GL_HALF_FLOAT, GL_FLOAT, GL_DOUBLE, GL_FIXED, GL_INT_2_10_10_10_REV, GL_UNSIGNED_INT_2_10_10_10_REV and GL_UNSIGNED_INT_10F_11F_11F_REV are accepted by glVertexAttribPointer. GL_DOUBLE is also accepted by glVertexAttribLPointer and is the only token accepted by the typeGL_FLOAT.
这里是我们指定数据类型 type,在本例中则是位置的浮点类型 GL_FLOAT。
normalized:For glVertexAttribPointer, specifies whether fixed-point data values should be normalized (GL_TRUE) or converted directly as fixed-point values (GL_FALSE) when they are accessed.
标准化其实不用太担心,如果我们处理的是浮点数,因为它们已经被规范化了。假设我们要指定一个颜色字节在 0 到 255 之间,它在我们的实际着色器作为一个浮点数需要被规范化到 0 到 1 之间,这不是一个你可以在 CPU 上做的事情,但你可以让 OpenGL 替你做。
stride:Specifies the byte offset between consecutive generic vertex attributes. If stride
stride 指针会让很多人感到困惑,如文档所示它就是连续通用顶点属性之间的字节偏移量,也可以理解为每个顶点之间的字节数。举个例子我们有位置 vec3、纹理坐标 vec2 和法线 vec3,那么我们的 stride 就是 3 * 4 + 2 * 4 + 3 * 4 = 32 字节,它是每个顶点的字节大小。
如果我们想从一个顶点跳到下一个顶点,我需要在缓冲区中加上 32 个字节。所以如果我们有一个指针指向缓冲区的开始,然后经过缓冲区的 32 个字节,我应该在下一个顶点的起点,这就是 stride。
pointer:Specifies an offset of the first component of the first generic vertex attribute in the array in the data store of the buffer currently bound to the GL_ARRAY_BUFFER target. The initial value is 0.
pointer 文档的表述上第一个组件的一个偏移量,它是指向实际属性的指针。不要管有多少个顶点,聚焦于一个顶点,里面包含位置、纹理坐标和法线。对于位置偏移量为 0,因为它是缓冲区的第一个字节;然后我们前进 12 个字节到达纹理坐标,所以对于我的纹理坐标属性这个值(pointer)是 12;最后再前进 8 字节得到顶点的法线,所以对于顶点法线属性 20 是这个 pointer 的值。
最后别忘了调用 glEnableVertexAttribArray() 去启用 glVertexAttribPointer():
1 2 glEnableVertexAttribArray (0 );glVertexAttribPointer (0 , 2 , GL_FLOAT, GL_FALSE, sizeof (float ) * 2 , 0 );
这两段代码告诉 OpenGL 缓冲区的布局是什么,理论上如果有一个着色器就可以看到在屏幕上看到三角形了。
1 2 3 4 5 6 7 8 9 10 11 12 13 14 15 16 17 18 19 20 21 22 23 24 25 26 27 28 29 30 31 32 33 34 35 36 37 38 39 40 41 42 43 44 45 46 47 48 49 50 51 52 53 54 55 56 57 58 59 60 61 62 #include <glew.h> #include <glfw3.h> #include <iostream> using namespace std;int main () if (!glfwInit ()) return -1 ; GLFWwindow* window = glfwCreateWindow (640 , 480 , "Hello World" , NULL , NULL ); if (!window) { glfwTerminate (); return -1 ; } glfwMakeContextCurrent (window); if (glewInit () != GLEW_OK) std::cout << "Error!" << std::endl; std::cout << glGetString (GL_VERSION) << std::endl; float positions[6 ] = { -0.5f , -0.5f , 0.0f , 0.5f , 0.5f , -0.5f }; unsigned int buffer; glGenBuffers (1 , &buffer); glBindBuffer (GL_ARRAY_BUFFER, buffer); glBufferData (GL_ARRAY_BUFFER, 6 * sizeof (float ), positions, GL_STATIC_DRAW); glEnableVertexAttribArray (0 ); glVertexAttribPointer (0 , 2 , GL_FLOAT, GL_FALSE, sizeof (float ) * 2 , 0 ); glBindBuffer (GL_ARRAY_BUFFER, 0 ); while (!glfwWindowShouldClose (window)) { glClear (GL_COLOR_BUFFER_BIT); glDrawArrays (GL_TRIANGLES, 0 , 3 ); glfwSwapBuffers (window); glfwPollEvents (); } glfwTerminate (); return 0 ; }
OpenGL中着色器的原理
今天我们讨论的都是关于着色器。
着色器 每个新手脑海里的第一个问题是什么是着色器?
着色器就是一个运行在显卡上的程序代码,它是我们可以在计算机上以文本或者字符串形式编写的代码,然后我们可以把它给 OpenGL 发到显卡上像其他程序一样编译链接,最后运行它,不同的是它是在我们的显卡上运行而不是 C++ 那样在我们的 CPU 上。那么为什么我们需要程序完全在显卡上运行呢?
究其原因是我们希望能够告诉显卡该做些什么,显卡处理图形的速度要快得多,我们想要利用显卡的能力在屏幕上绘制图形。这并不意味着所有的工作必须在显卡上完成,CPU 有自己擅长的部分,也许之后我们可以将结果数据发送给显卡同时仍然在 CPU 上进行处理。
着色器类型 对于大多数图形编程,我们会把重点放在两种着色器:顶点着色器和片段着色器(又称像素着色器)。
虽然还没有正式讲过标准图形渲染管线,但是我们应该对它大致是如何工作的应该了解:我们在 CPU 上写了一堆数据,向显卡发送这些数据并且发出一个叫做 DrawCall 指令的东西,也绑定了某些状态,最后我们进入了着色器阶段,GPU 实际处理 DrawCall 指令并在屏幕上绘制一些东西。这个特定的过程基本上就是渲染管道,我们如何在屏幕上从数据到结果的。
现在当显卡开始绘制三角形时,着色器就派上用场了。顶点着色器和片段着色器是渲染管线两种不同的着色器类型,所以当我们真正发出 DrawCall 指令时,顶点着色器会被调用,然后片段着色器会被调用,最后我们会在屏幕上看到结果。
顶点着色器 那么顶点着色器是做什么的?
它会被我们渲染的每个顶点调用,在这个例子中我们有一个三角形三个顶点,这意味着顶点着色器会被调用三次,每个顶点调用一次。顶点着色器的主要目的是告诉 OpenGL 你希望这个顶点在屏幕空间的什么位置。再强调一次,顶点着色器的主要目的是提供那些顶点的位置,如果有必要我们需要能够提供一些变换以便 OpenGL 能把这些数字转化成屏幕坐标,这样我们就能在窗口中看到我们的图形在对的位置。
片段着色器 一旦顶点着色器运行结束,我们就进入了管道的下一个阶段:片段着色器或者像素着色器。
虽然片段和像素在术语上有点小差别,但现在你可以把像素当成片段或者把片段想象成像素,因为片段着色器会为每个需要光栅化的像素运行一次。我们的窗口基本上是由像素组成的,我们指定的那三个顶点组成我们的三角形现在需要用实际的像素填充,这就是光栅化阶段所做的。
片段着色器或像素着色器就是对三角形中需要填充的每个像素调用一次,主要决定这个像素是什么颜色,这就是它的作用,它决定了像素的输出颜色,这样像素就可以用正确的颜色着色。形象一点可以把它想象成一本涂色本,当你只有东西的轮廓时需要给它上色,这就是片段着色器的职责。
相比于顶点着色器,片段着色器里面的东西代价要高得多,因为它会为每个像素运行。
话虽如此,有些东西显然需要按像素计算例如光源。如果你在计算光源,每个像素都有一个颜色值,这个值是由很多东西决定:光源、环境、纹理、提供给表面的材质……所有这些一起来确定一个特定像素的正确颜色。显然这取决于一些输入,例如相机的位置在哪里,而这些所有的东西结束后你在片段着色器中的决定仅仅是单个像素的颜色,这就是片段着色器的作用。
OpenGL中写一个着色器
让我们开始写一些着色器代码吧。
准备工作 首先创建一个 CreateShader() 创建着色器函数,传入两个着色器字符串,这些字符串都是实际的代码:
1 2 3 4 static int CreateShader (const std::string& vertexShader, const std::string& fragmentShader) }
和创建缓冲区一致,我们需要返回一个整型作为标识符,当我们想绑定的时候可以绑定那个缓冲区 id。
所以我们要做的第一件事就是创建一个程序,基本上我们只需要输入 glCreateProgram(),该函数不需要传入整数引用之类的东西,它会返回一个无符号的整数(顺带一提,这里和后面不使用 OpenGL 自带类型的原因是个人处理多种类型的图形 API,更倾向于 C++ 类型):
1 unsigned int program = glCreateProgram ();
接下来我们需要做的是创建我们的两个着色器对象:
1 unsigned int vs = glCreateShader (GL_VERTEX_SHADER);
考虑到这个工作在今后的复用性,可以另创建一个函数 CompileShader():
1 2 3 4 static unsigned int CompileShader (unsigned int type, const std::string& source) unsigned int id = glCreateShader (type); }
然后可以加一个初始化函数,查找字符串中的第一个字符然后返回它的内存地址:
1 2 const char * src = source.c_str ();
最后就是调用 glShaderSource() 和 glCompileShader():
1 2 3 4 5 6 7 8 9 10 11 static unsigned int CompileShader (unsigned int type, const std::string& source) unsigned int id = glCreateShader (type); const char * src = source.c_str (); glShaderSource (id, 1 , &src, nullptr ); glCompileShader (id); return id; }
回到 CreateShader():
1 2 3 4 5 6 static unsigned int CreateShader (const std::string& vertexShader, const std::string& fragmentShader) unsigned int program = glCreateProgram (); unsigned int vs = CompileShader (GL_VERTEX_SHADER, vertexShader); unsigned int fs = CompileShader (GL_FRAGMENT_SHADER, fragmentShader); }
这个过程很像 C++编译中将两个不同的文件链接在一起,以便可以同时使用它们:
1 2 3 4 glAttachShader (program, vs);glAttachShader (program, fs);glLinkProgram (program);glValidateProgram (program);
最后我们实际上现在可以删了我们的着色器,因为它们已经被链接到一个程序中,所以我们可以删除这些中间文件:
1 2 glDeleteShader (vs);glDeleteShader (fs);
最终我们的函数源码:
1 2 3 4 5 6 7 8 9 10 11 12 13 14 15 16 static unsigned int CreateShader (const std::string& vertexShader, const std::string& fragmentShader) unsigned int program = glCreateProgram (); unsigned int vs = CompileShader (GL_VERTEX_SHADER, vertexShader); unsigned int fs = CompileShader (GL_FRAGMENT_SHADER, fragmentShader); glAttachShader (program, vs); glAttachShader (program, fs); glLinkProgram (program); glValidateProgram (program); glDeleteShader (vs); glDeleteShader (fs); return program; }
错误处理 让我们快速做一下这个错误处理。
1 2 3 4 5 6 7 8 9 10 11 static unsigned int CompileShader (unsigned int type, const std::string& source) unsigned int id = glCreateShader (type); const char * src = source.c_str (); glShaderSource (id, 1 , &src, nullptr ); glCompileShader (id); return id; }
编译着色器实际上不会返回任何东西,所以如果任何东西出错我们无法检索找出问题。但我们可以通过调用 glGetShaderiv() 实现:
1 2 int result;glGetShaderiv (id, GL_COMPILE_STATUS, &result);
判断 result,检索错误信息的长度并输出信息:
1 2 3 4 5 6 7 8 9 10 11 12 13 14 15 16 17 18 19 20 21 22 23 24 25 26 27 28 static unsigned int CompileShader (unsigned int type, const std::string& source) unsigned int id = glCreateShader (type); const char * src = source.c_str (); glShaderSource (id, 1 , &src, nullptr ); glCompileShader (id); int result; glGetShaderiv (id, GL_COMPILE_STATUS, &result); if (result == GL_FALSE) { int length; glGetShaderiv (id, GL_INFO_LOG_LENGTH, &length); char * message = (char *)alloca (length * sizeof (char )); glGetShaderInfoLog (id, length, &length, message); std::cout << "Failed to complie " << (type == GL_VERTEX_SHADER ? "vertex" : "fragment" ) << "shader!" << std::endl; std::cout << message << std::endl; glDeleteShader (id); return 0 ; } return id; }
着色器编写 首先 #version 330 core 意味着我们将使用 GLSL(OpenGL 的着色器),其次指定位置和颜色:
1 2 3 4 5 6 7 8 9 10 11 12 13 14 15 16 17 18 19 20 21 std::string vertexShader = R"( #version 330 core layout (location = 0 ) in vec4 position; void main() { gl_Position = position; } )"; std::string fragmentShader = R"( #version 330 core layout (location = 0 ) out vec4 color; void main() { color = vec4 (1.0 , 0.0 , 0.0 , 1.0 ); } )";
完整代码如下:
1 2 3 4 5 6 7 8 9 10 11 12 13 14 15 16 17 18 19 20 21 22 23 24 25 26 27 28 29 30 31 32 33 34 35 36 37 38 39 40 41 42 43 44 45 46 47 48 49 50 51 52 53 54 55 56 57 58 59 60 61 62 63 64 65 66 67 68 69 70 71 72 73 74 75 76 77 78 79 80 81 82 83 84 85 86 87 88 89 90 91 92 93 94 95 96 97 98 99 100 101 102 103 104 105 106 107 108 109 110 111 112 113 114 115 116 117 118 #include <GL/glew.h> #include <GLFW/glfw3.h> #include <iostream> static unsigned int CompileShader (unsigned int type, const std::string& source) unsigned int id = glCreateShader (type); const char * src = source.c_str (); glShaderSource (id, 1 , &src, nullptr ); glCompileShader (id); int result; glGetShaderiv (id, GL_COMPILE_STATUS, &result); if (result == GL_FALSE) { int length; glGetShaderiv (id, GL_INFO_LOG_LENGTH, &length); char * message = (char *)alloca (length * sizeof (char )); glGetShaderInfoLog (id, length, &length, message); std::cout << "Failed to compile " << (type == GL_VERTEX_SHADER ? "vertex" : "fragment" ) << " shader!" << std::endl; std::cout << message << std::endl; glDeleteShader (id); return 0 ; } return id; } static unsigned int CreateShader (const std::string& vertexShader, const std::string& fragmentShader) unsigned int program = glCreateProgram (); unsigned int vs = CompileShader (GL_VERTEX_SHADER, vertexShader); unsigned int fs = CompileShader (GL_FRAGMENT_SHADER, fragmentShader); glAttachShader (program, vs); glAttachShader (program, fs); glLinkProgram (program); glValidateProgram (program); glDeleteShader (vs); glDeleteShader (fs); return program; } int main (void ) GLFWwindow* window; if (!glfwInit ()) return -1 ; window = glfwCreateWindow (640 , 480 , "Window" , NULL , NULL ); if (!window) { glfwTerminate (); return -1 ; } glfwMakeContextCurrent (window); if (glewInit () != GLEW_OK) std::cout << "Error!" << std::endl; std::cout << glGetString (GL_VERSION) << std::endl; float positions[6 ] = { -0.5f , -0.5f , 0.0f , 0.5f , 0.5f , -0.5f }; unsigned int buffer; glGenBuffers (1 , &buffer); glBindBuffer (GL_ARRAY_BUFFER, buffer); glBufferData (GL_ARRAY_BUFFER, 6 * sizeof (float ), positions, GL_STATIC_DRAW); glEnableVertexAttribArray (0 ); glVertexAttribPointer (0 , 2 , GL_FLOAT, GL_FALSE, sizeof (float ) * 2 , 0 ); std::string vertexShader = "#version 330 core\n" "\n" "layout(location = 0) in vec4 position;\n" "\n" "void main()\n" "{\n" " glPosition = position;\n" "}\n" ; std::string fragmentShader = "#version 450 core\n" "\n" "layout(location = 0) out vec4 colour;\n" "\n" "void main()\n" "{\n" " colour = vec4(1.0, 0.0, 0.0, 1.0);\n" "}\n" ; unsigned int shader = CreateShader (vertexShader, fragmentShader); glUseProgram (shader); while (!glfwWindowShouldClose (window)) { glClear (GL_COLOR_BUFFER_BIT); glDrawArrays (GL_TRIANGLES, 0 , 3 ); glfwSwapBuffers (window); glfwPollEvents (); } glfwTerminate (); return 0 ; }
整理错误 1 2 3 4 5 6 7 8 9 Failed to compile vertex shader! ERROR: 0:1: '' : version '330' is not supported ERROR: 0:1: '' : syntax error: #version ERROR: 0:3: 'layout' : syntax error: syntax error Failed to compile fragment shader! ERROR: 0:1: '' : version '450' is not supported ERROR: 0:1: '' : syntax error: #version ERROR: 0:3: 'layout' : syntax error: syntax error
在 stackoverflow 有人遇到了相同的问题,解决方法如下:
add these line of code in front of glCreateWindow
add VAO as @Ali ASkari memtion above (Modern OpenGL requires a VAO be defined and bound if you are using the core profile.)
1 2 3 4 5 6 7 8 9 10 11 12 13 14 15 16 17 18 19 20 21 22 23 24 25 26 27 28 29 30 31 32 33 34 35 36 37 38 39 40 41 42 43 44 45 46 47 48 49 50 51 52 53 54 55 56 57 58 59 60 61 62 63 64 65 66 67 68 69 70 71 72 73 74 75 76 77 78 79 80 81 82 83 84 85 86 87 88 89 90 91 92 93 94 95 96 97 98 99 100 101 102 103 104 105 106 107 108 109 110 111 112 113 114 115 116 117 118 119 120 121 122 123 124 125 126 127 128 129 130 131 132 133 134 135 136 137 138 139 140 141 142 143 144 145 146 147 148 149 150 151 152 153 154 155 156 #include <iostream> // GLEW #include <glew.h> // GLFW #include <glfw3.h> static unsigned int CompileShader(unsigned int type, const std::string& source) { unsigned int id = glCreateShader(type); const char* src = source.c_str(); glShaderSource(id, 1, &src, nullptr); glCompileShader(id); // TODO: Error handling int result; glGetShaderiv(id, GL_COMPILE_STATUS, &result); if (result == GL_FALSE) { int length; glGetShaderiv(id, GL_INFO_LOG_LENGTH, &length); char* message = (char*)alloca(length * sizeof(char)); glGetShaderInfoLog(id, length, &length, message); std::cout << "Failed to complie " << (type == GL_VERTEX_SHADER ? "vertex" : "fragment") << "shader!" << std::endl; std::cout << message << std::endl; glDeleteShader(id); return 0; } return id; } static unsigned int CreateShader(const std::string& vertexShader, const std::string& fragmentShader) { unsigned int program = glCreateProgram(); unsigned int vs = CompileShader(GL_VERTEX_SHADER, vertexShader); unsigned int fs = CompileShader(GL_FRAGMENT_SHADER, fragmentShader); glAttachShader(program, vs); glAttachShader(program, fs); glLinkProgram(program); glValidateProgram(program); glDeleteShader(vs); glDeleteShader(fs); return program; } int main() { /* Initialize the library */ GLFWwindow* window; if(!glfwInit()) return -1; + glfwWindowHint(GLFW_CONTEXT_VERSION_MAJOR, 3); + glfwWindowHint(GLFW_CONTEXT_VERSION_MINOR, 3); + glfwWindowHint(GLFW_OPENGL_PROFILE, GLFW_OPENGL_CORE_PROFILE); + #ifdef __APPLE__ + std::cout << "I'm apple machine" << std::endl; + glfwWindowHint(GLFW_OPENGL_FORWARD_COMPAT, GL_TRUE); + #endif unsigned int width = 800; unsigned int height = 600; /* Create a Windowed mode and its OpenGL context */ window = glfwCreateWindow(width, height, "Hello World", NULL, NULL); if(!window) { std::cout << " can't create window!!!" << std::endl; glfwTerminate(); return -1; } unsigned int major = glfwGetWindowAttrib(window, GLFW_CONTEXT_VERSION_MAJOR); unsigned int minor = glfwGetWindowAttrib(window, GLFW_CONTEXT_VERSION_MINOR); std::cout << "opengl shader version: " << major << "." << minor << std::endl; /* Make the window's context current */ glfwMakeContextCurrent(window); if(glewInit() != GLEW_OK) std::cout << "Error!" << std::endl; std::cout << glGetString(GL_VERSION) << std::endl; float positions[6] = { -0.5f, -0.5f, 0.0f, 0.5f, 0.5f, -0.5f }; + unsigned int VBO, VAO; + glGenBuffers(1, &VBO); + glGenVertexArrays(1, &VAO); + glBindVertexArray(VAO); glBindBuffer(GL_ARRAY_BUFFER, VBO); glBufferData(GL_ARRAY_BUFFER, 6 * sizeof(float), positions, GL_STATIC_DRAW); glEnableVertexAttribArray(0); glVertexAttribPointer(0, 2, GL_FLOAT, GL_FALSE, sizeof(float) * 2, 0); std::string vertexShader = R"( #version 330 core layout(location = 0) in vec4 position; void main() { gl_Position = position; } )"; std::string fragmentShader = R"( #version 330 core layout(location = 0) out vec4 color; void main() { color = vec4(1.0, 0.0, 0.0, 1.0); } )"; unsigned int shader = CreateShader(vertexShader, fragmentShader); glUseProgram(shader); /* Loop until the user closes the window */ while(!glfwWindowShouldClose(window)) { /* Render here */ glClear(GL_COLOR_BUFFER_BIT); glDrawArrays(GL_TRIANGLES, 0, 3); /* Swap front and back buffers */ glfwSwapBuffers(window); /* Poll for and events */ glfwPollEvents(); } + glDeleteVertexArrays(1, &VAO); + glDeleteBuffers(1, &VBO); glDeleteProgram(shader); glfwTerminate(); return 0; }
OpenGL中如何处理着色器
个人习惯将两个着色器合并到一个只有顶点和片段着色器的文件中。不管怎样,让我们进入代码展示这一切的原理。
着色器合并 首先我们实际上要做的是创建一个包含这两个着色器的文件,以便我们了解是如何处理它们的。
在项目目录中创建一个放置资源的 res 文件夹,在该文件夹下创建专门放置着色器的 shaders 文件夹,在之后我们可能会有像纹理之类的其他资源。最后在 shaders/ 下新建文件 Basic.shader:
现在我们有了一个着色器文本,你可以看到它没有显示 C++ 图标,这非常重要因为我们不想把它编译成 C++ 代码。将之前的着色器代码复制粘贴到文件中:
1 2 3 4 5 6 7 8 9 10 11 12 13 14 15 16 17 18 19 20 #shader vertex #version 330 core layout (location = 0 ) in vec4 position;void main(){ gl_Position = position; } #shader fragment #version 330 core layout (location = 0 ) out vec4 color;void main(){ color = vec4 (1.0 , 0.0 , 0.0 , 1.0 ); }
这样我们就无需在两个不同的着色器文件之间切换,并且很简单干净有条理。
着色器读取与使用 下面我们要做的就是读取这个文件,然后把它分成两块字符串,一个是我们的片段着色器,而另一个就是我们的顶点着色器源码。引入头文件 #include<fstream>,打开文件:
1 2 3 4 static void ParseShader (const std::string& filepath) std::fstream stream (filepath) ; }
所以现在我们需要做的就是一行一行地浏览那个文件,然后只去检查是否是指定的着色器类型。
1 2 3 4 5 6 7 8 9 10 11 12 std::string line; while (getline (stream, line)){ if (line.find ("#shader" ) != std::string::npos) { if (line.find ("vertex" ) != std::string::npos) else if (line.find ("fragment" ) != std::string::npos) } }
添加着色器类型并在分支设定正确的类型:
1 2 3 4 5 6 7 8 9 10 11 12 13 14 15 16 17 18 19 20 21 22 enum class ShaderType { NONE = -1 , VERTEX = 0 , FRAGMENT = 1 }; std::string line; std::stringstream ss[2 ]; ShaderType type = ShaderType::NONE; while (getline (stream, line)){ if (line.find ("#shader" ) != std::string::npos) { if (line.find ("vertex" ) != std::string::npos) type = ShaderType::VERTEX; else if (line.find ("fragment" ) != std::string::npos) type = ShaderType::FRAGMENT; } } else { ss[(int )type] << line << '\n' ; }
最后源码如下:
1 2 3 4 5 6 7 8 9 10 11 12 13 14 15 16 17 18 19 20 21 22 23 24 25 26 27 28 29 30 31 32 33 34 35 36 37 38 39 40 41 42 43 44 45 46 47 48 49 50 51 52 53 54 55 56 57 58 59 60 61 62 63 64 65 66 67 68 69 70 71 72 73 74 75 76 77 78 79 80 81 82 83 84 85 86 87 88 89 90 91 92 93 94 95 96 97 98 99 100 101 102 103 104 105 106 107 108 109 110 111 112 113 114 115 116 117 118 119 120 121 122 123 124 125 126 127 128 129 130 131 132 133 134 135 136 137 138 139 140 141 142 143 144 145 146 147 148 149 150 151 #include <iostream> #include <fstream> #include <string> #include <sstream> #include <GL/glew.h> #include <GLFW/glfw3.h> struct ShaderProgramSource { std::string VertexSource; std::string FragmentSource; }; static ShaderProgramSource ParseShader (const std::string& filepath) std::ifstream stream (filepath) ; enum class ShaderType { NONE = -1 , VERTEX = 0 , FRAGMENT = 1 }; std::string line; std::stringstream ss[2 ]; ShaderType type = ShaderType::NONE; while (getline (stream, line)) { if (line.find ("#shader" ) != std::string::npos) { if (line.find ("vertex" ) != std::string::npos) type = ShaderType::VERTEX; else if (line.find ("fragment" ) != std::string::npos) type = ShaderType::FRAGMENT; } else { ss[(int )type] << line << '\n' ; } } return { ss[0 ].str (), ss[1 ].str () }; } static unsigned int CompileShader (unsigned int type, const std::string& source) unsigned int id = glCreateShader (type); const char * src = source.c_str (); glShaderSource (id, 1 , &src, nullptr ); glCompileShader (id); int result; glGetShaderiv (id, GL_COMPILE_STATUS, &result); if (result == GL_FALSE) { int length; glGetShaderiv (id, GL_INFO_LOG_LENGTH, &length); char * message = (char *)malloc (length * sizeof (char )); glGetShaderInfoLog (id, length, &length, message); std::cout << "Failed to compile " << (type == GL_VERTEX_SHADER ? "vertex" : "fragment" ) << "shader!" << std::endl; std::cout << message << std::endl; glDeleteShader (id); return 0 ; } return id; } static unsigned int CreateShader (const std::string& vertexShader, const std::string& fragmentShader) unsigned int program = glCreateProgram (); unsigned int vs = CompileShader (GL_VERTEX_SHADER, vertexShader); unsigned int fs = CompileShader (GL_FRAGMENT_SHADER, fragmentShader); glAttachShader (program, vs); glAttachShader (program, fs); glLinkProgram (program); glValidateProgram (program); glDeleteShader (vs); glDeleteShader (fs); return program; } int main () if (!glfwInit ()) return -1 ; GLFWwindow* window = glfwCreateWindow (640 , 480 , "Hello World" , NULL , NULL ); if (!window) { glfwTerminate (); return -1 ; } glfwMakeContextCurrent (window); if (glewInit () != GLEW_OK) std::cout << "Error!" << std::endl; std::cout << glGetString (GL_VERSION) << std::endl; float positions[6 ] = { -0.5f , -0.5f , 0.0f , 0.5f , 0.5f , -0.5f }; unsigned int buffer; glGenBuffers (1 , &buffer); glBindBuffer (GL_ARRAY_BUFFER, buffer); glBufferData (GL_ARRAY_BUFFER, 6 * sizeof (float ), positions, GL_STATIC_DRAW); glEnableVertexAttribArray (0 ); glVertexAttribPointer (0 , 2 , GL_FLOAT, GL_FALSE, sizeof (float ) * 2 , 0 ); ShaderProgramSource source = ParseShader ("res/shader/basic.shader" ); unsigned int shader = CreateShader (source.VertexSource, source.FragmentSource); glUseProgram (shader); while (!glfwWindowShouldClose (window)) { glClear (GL_COLOR_BUFFER_BIT); glDrawArrays (GL_TRIANGLES, 0 , 3 ); glfwSwapBuffers (window); glfwPollEvents (); } glDeleteProgram (shader); glfwTerminate (); return 0 ; }
由于 Mac 出现的各种错误太多了,相同代码跑不通太浪费时间了,所以还是转到了 Windows 上:
OpenGL中的索引缓冲区
今天我们会讨论索引缓冲区。
绘制四边形 在我们讨论索引缓冲区为什么用它以及它到底是什么之前,让我们先考虑一个图形编程的基础的问题:去画一个正方形。
显然我们可以通过拼接两个三角形实现,先画出来第一个三角形:
1 2 3 4 5 float positions[6 ] = { -0.5f , -0.5f , 0.5f , -0.5f , 0.5f , 0.5f };
回到我们的代码增加另一个三角形的三个顶点(其中两个顶点与第一个三角形重合):
1 2 3 4 5 6 7 8 9 +float positions[12] = { -0.5f, -0.5f, 0.5f, -0.5f, 0.5f, 0.5f, + 0.5f, 0.5f, + -0.5f, 0.5f, + -0.5f, -0.5f };
同时更改一下缓冲区的设置:
1 2 3 4 unsigned int buffer; glGenBuffers(1, &buffer); glBindBuffer(GL_ARRAY_BUFFER, buffer); +glBufferData(GL_ARRAY_BUFFER, 6 * 2 * sizeof(float), positions, GL_STATIC_DRAW);
由于我们绘制的是六个顶点,所以这里也要改:
1 glDrawArrays (GL_TRIANGLES, 0 , 6 );
这里不是正方形的原因是因为窗口原因。
很酷!我们已经画出了一个正方形,它并不太难,但是绘制这个正方形的方式有些东西不太理想:我们的两个顶点是完全一样的,也就是在复制我们的内存,我们在显存中存储相同顶点的相同字节,存储了多次。因为显存并不是无限的,而我们想要降低它的内存使用。
索引缓冲区 所以我们能做的就是使用一个叫做索引缓冲区的东西,这允许我们重用现有的顶点。对于矩形或者正方形而言可能还好,它看起来可能并不浪费,因为它没有太多的东西。然而当它换成游戏中的 3D 模型如宇宙飞船,每一个组成那个飞船的独立三角形会被连接到另一个三角形,这意味着你已经立马重复了至少两个顶点,每个顶点再包含法线、切线、纹理坐标的数据,那么你不得不复制整个缓冲区,它一次又一次地构成了那个实际的顶点,那是完全不现实的。
让我们来转换一下这种顶点缓冲,添加一个索引缓冲区并删除那些重复的冗余内存。
1 2 3 4 5 6 float positions[] = { -0.5f , -0.5f , 0.5f , -0.5f , 0.5f , 0.5f , -0.5f , 0.5f };
接着创建一个无符号整型数组 indices:
1 2 3 4 5 6 7 8 9 10 11 float positions[] = { -0.5f , -0.5f , 0.5f , -0.5f , 0.5f , 0.5f , -0.5f , 0.5f }; unsigned int indices[] = { 0 , 1 , 2 , 2 , 3 , 0 }
这实际就是一个索引缓冲区,我们需要说明 OpenGL 如何去渲染这个三角形或者正方形,而不是给它提供冗余或重复的顶点位置。在这个例子中我们只有位置,但实际应用中可能会有更多的数据。
现在我们需要把它们发送到显卡上,并且告诉 OpenGL 用它们去渲染。而我们实现的方式非常类似于创建顶点缓冲区:
1 2 3 4 unsigned int ibo;glGenBuffers (1 , &ibo);glBindBuffer (GL_ELEMENT_ARRAY_BUFFER, ibo);glBufferData (GL_ELEMENT_ARRAY_BUFFER, 6 * sizeof (unsigned int ), indices, GL_STATIC_DRAW);
ibo 代表索引缓冲区对象,表示这个特定的索引缓冲区。这里唯一的区别是把 GL_ARRAY_BUFFER 换为 GL_ELEMENT_ARRAY_BUFFER,positions 替换为之前的 indices。
需要说明一下我们会在所有这些例子中使用 unsigned int,因为在这种情况下不会有任何的性能差异,这里的关键是必须使用无符号类型。
最后需要改变的是我们的 DrawCall:
1 2 -glDrawArrays(GL_TRIANGLES, 0, 3); +glDrawElements(GL_TRIANGLES, 6, GL_UNSIGNED_INT, nullptr);
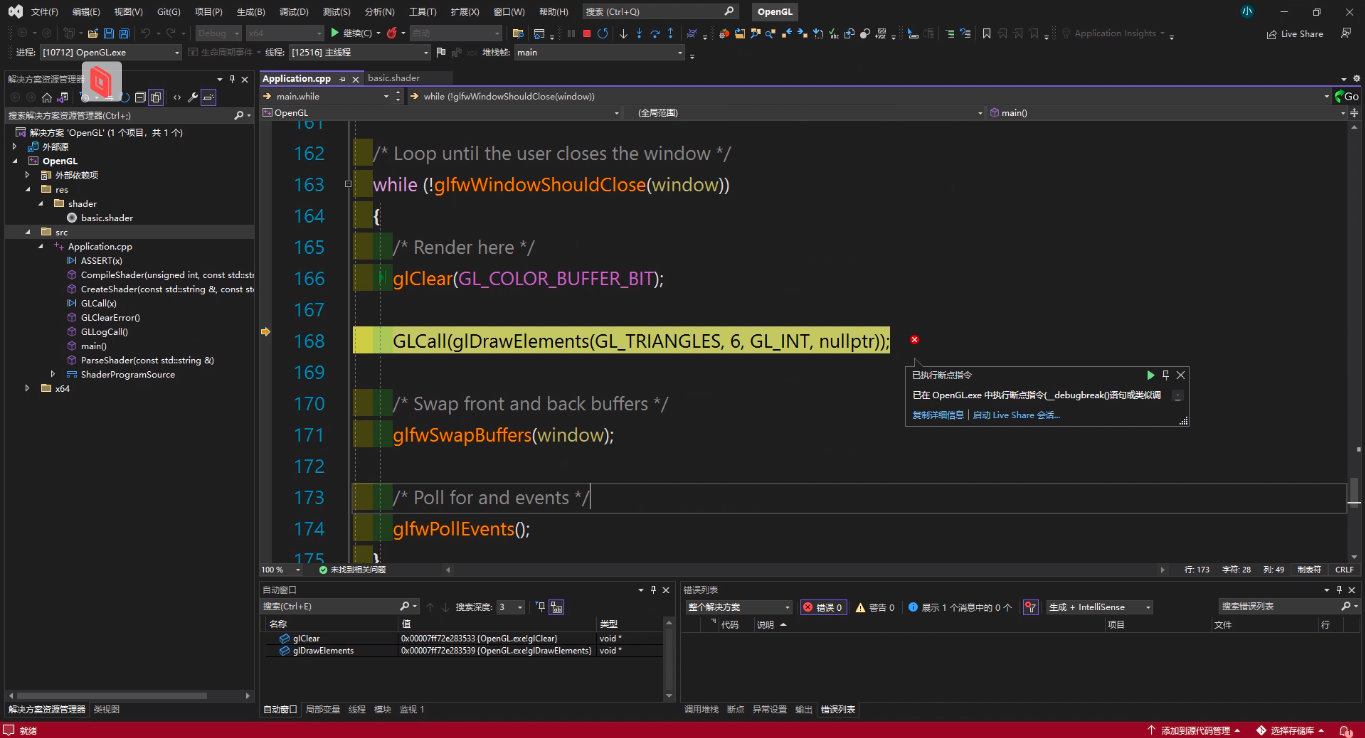
count 就是我们需要绘制的 6 个索引,绘制索引的数量而非我们绘制顶点的数量;type 就是在索引缓冲区中的数据类型,在本例中是 GL_UNSIGNED_INT;最后是指向那个索引缓冲区的指针,而前面我们已经绑定了 ibo,所以这里可以填 nullptr。这就是我们绘制三角形的实际 DrawCall 指令。
运行程序,你可以看到我们得到了一个漂亮的矩形。
我们已经删除了任何重复的顶点,在顶点缓冲区中得到了完全唯一的顶点,之后创建了一个索引以便多次绘制顶点;然后我们用 ibo 绑定代码把索引缓冲区发送给显卡;最终我们使用 glDrawElements() 绘制图形。
1 2 3 4 5 6 7 8 9 10 11 12 13 14 15 16 17 18 19 20 21 22 23 24 25 26 27 28 29 30 31 32 33 34 35 36 37 38 39 40 41 42 43 44 45 46 47 48 49 50 51 52 53 54 55 56 57 58 59 60 61 62 63 64 65 66 67 68 69 70 71 72 73 74 75 76 77 78 79 80 81 82 83 84 85 86 87 88 89 90 91 92 93 94 95 96 97 98 99 100 101 102 103 104 105 106 107 108 109 110 111 112 113 114 115 116 117 118 119 120 121 122 123 124 125 126 127 128 129 130 131 132 133 134 135 136 137 138 139 140 141 142 143 144 145 146 147 148 149 150 151 152 153 154 155 156 157 158 159 160 161 162 #include <iostream> #include <fstream> #include <string> #include <sstream> #include <GL/glew.h> #include <GLFW/glfw3.h> struct ShaderProgramSource { std::string VertexSource; std::string FragmentSource; }; static ShaderProgramSource ParseShader (const std::string& filepath) std::ifstream stream (filepath) ; enum class ShaderType { NONE = -1 , VERTEX = 0 , FRAGMENT = 1 }; std::string line; std::stringstream ss[2 ]; ShaderType type = ShaderType::NONE; while (getline (stream, line)) { if (line.find ("#shader" ) != std::string::npos) { if (line.find ("vertex" ) != std::string::npos) type = ShaderType::VERTEX; else if (line.find ("fragment" ) != std::string::npos) type = ShaderType::FRAGMENT; } else { ss[(int )type] << line << '\n' ; } } return { ss[0 ].str (), ss[1 ].str () }; } static unsigned int CompileShader (unsigned int type, const std::string& source) unsigned int id = glCreateShader (type); const char * src = source.c_str (); glShaderSource (id, 1 , &src, nullptr ); glCompileShader (id); int result; glGetShaderiv (id, GL_COMPILE_STATUS, &result); if (result == GL_FALSE) { int length; glGetShaderiv (id, GL_INFO_LOG_LENGTH, &length); char * message = (char *)malloc (length * sizeof (char )); glGetShaderInfoLog (id, length, &length, message); std::cout << "Failed to compile " << (type == GL_VERTEX_SHADER ? "vertex" : "fragment" ) << "shader!" << std::endl; std::cout << message << std::endl; glDeleteShader (id); return 0 ; } return id; } static unsigned int CreateShader (const std::string& vertexShader, const std::string& fragmentShader) unsigned int program = glCreateProgram (); unsigned int vs = CompileShader (GL_VERTEX_SHADER, vertexShader); unsigned int fs = CompileShader (GL_FRAGMENT_SHADER, fragmentShader); glAttachShader (program, vs); glAttachShader (program, fs); glLinkProgram (program); glValidateProgram (program); glDeleteShader (vs); glDeleteShader (fs); return program; } int main () if (!glfwInit ()) return -1 ; GLFWwindow* window = glfwCreateWindow (640 , 480 , "Hello World" , NULL , NULL ); if (!window) { glfwTerminate (); return -1 ; } glfwMakeContextCurrent (window); if (glewInit () != GLEW_OK) std::cout << "Error!" << std::endl; std::cout << glGetString (GL_VERSION) << std::endl; float positions[] = { -0.5f , -0.5f , 0.5f , -0.5f , 0.5f , 0.5f , -0.5f , 0.5f }; unsigned int indices[] = { 0 , 1 , 2 , 2 , 3 , 0 }; unsigned int buffer; glGenBuffers (1 , &buffer); glBindBuffer (GL_ARRAY_BUFFER, buffer); glBufferData (GL_ARRAY_BUFFER, 6 * 2 * sizeof (float ), positions, GL_STATIC_DRAW); glEnableVertexAttribArray (0 ); glVertexAttribPointer (0 , 2 , GL_FLOAT, GL_FALSE, sizeof (float ) * 2 , 0 ); unsigned int ibo; glGenBuffers (1 , &ibo); glBindBuffer (GL_ELEMENT_ARRAY_BUFFER, ibo); glBufferData (GL_ELEMENT_ARRAY_BUFFER, 6 * sizeof (unsigned int ), indices, GL_STATIC_DRAW); ShaderProgramSource source = ParseShader ("res/shader/basic.shader" ); unsigned int shader = CreateShader (source.VertexSource, source.FragmentSource); glUseProgram (shader); while (!glfwWindowShouldClose (window)) { glClear (GL_COLOR_BUFFER_BIT); glDrawElements (GL_TRIANGLES, 6 , GL_UNSIGNED_INT, nullptr ); glfwSwapBuffers (window); glfwPollEvents (); } glDeleteProgram (shader); glfwTerminate (); return 0 ; }
OpenGL中处理错误
今天我们要讨论的都是错误,我们怎么知道我们做错了什么以及如何尽快地调试并修复它。
glGetError 我们有两种主要的方式来检查 OpenGL 中的错误,其中一个一个叫做 glGetError(),它是一个我们可以调用的 OpenGL 内置函数。它能够兼容所有版本并且原理相对简单:在我们调用 OpenGL 时如果发生错误,内存中有一个标志会被内部设置,其会说明发生了什么类型的错误,并且当我们调用 glGetError() 时它会返回一个标志(或者说错误码)。如果我们继续调用 glGetError() 它会把所有标志返回给我们,因为我们可能会产生多个类型的错误。
回到上次渲染正方形的代码,我们可以更改索引缓冲区类型导致错误:
1 2 -glDrawElements(GL_TRIANGLES, 6, GL_UNSIGNED_INT, nullptr); +glDrawElements(GL_TRIANGLES, 6, GL_INT, nullptr);
可以看到小小的改动得到的就是黑屏,我们的矩形根本没有渲染,这太糟糕了。
glDebugMessageCallback 在最近的 OpenGL 4.3 中添加了一个新的函数 glDebugMessageCallback()。
查阅文档,可以发现它允许我们指定一个指向 OpenGL 的函数指针,当错误发生时 OpenGL 会调用我们的那个函数。
唯一的问题在于兼容性,它只在 4.3 及以上版本,所以你不能再早期版本中使用它。优点也很明显,它不会仅仅给你一个错误码,会提供更详细的信息。根据我的经验, glDebugMessageCallback() 总体上非常好,比 glGetError() 好得多。但今天我们只讨论 glGetError()。
可以创建一个循环调用的报错函数 GLClearError():
1 2 3 4 5 static void GLClearError () while (!glGetError ()); }
接下来创建另一个打印出实际错误的函数 GLCheckError():
1 2 3 4 5 6 7 static void GLCheckError () while (GLenum error = glGetError ()) { std::cout << "[OpenGL Error] (" << error << ")" << std::endl; } }
现在让我们调用一下刚才的函数:
1 2 3 +GLClearError(); glDrawElements(GL_TRIANGLES, 6, GL_INT, nullptr); +GLCheckError();
首先排除其他的错误,相当于调试的断言。通过这样的方式我们可以确保所有的错误实际上都是来自这个函数。
可以看到错误代码是 1280。在源码中搜索 1280 找不到任何东西,因为 OpenGL 采用的是十六进制表示错误码。所以我们可以换为十六进制:0x0500。再返回 <glew.h> 文件检索:
1 #define GL_INVALID_ENUM 0x0500
500 意味着无效的枚举,而 GL_INT确实是我们实际传递的无效枚举,它应该是无符号整型。
实际上 glClearError() 和 glCheckError() 还是比较笨重,并且让扩展变得更加困难。但我们实际上可以做的就是得到实际的调试器,暂时执行并在导致错误的代码行上中断。我们可以通过使用断言来实现这一点,如果那个条件是 false,你通常要么将消息写入控制台,要么只是停止程序的执行并且在那行中断。
为此我需要修改 GLCheckError() 变为 GLLogCall():
1 2 3 4 5 6 7 8 9 10 static bool GLLogCall () while (GLenum error = glGetError ()) { std::cout << "[OpenGL Error] (" << error << ")" << std::endl; return false ; } return true ; }
接着在头文件下面定义宏断言:
1 #define ASSERT(x) if (!(x)) __debugbreak();
这是 MSVC 特有的,在 clang、gcc 或者其他编译器中都不起作用。最后插入断言:
1 2 3 4 GLClearError(); glDrawElements(GL_TRIANGLES, 6, GL_INT, nullptr); -GLCheckError(); +ASSERT(GLLogCall());
为了方便起见定义宏 GLCall():
1 #define GLCall(x) GLClearError(); x; ASSERT(GLLogCall())
更改调用:
1 GLCall (glDrawElements (GL_TRIANGLES, 6 , GL_INT, nullptr ));
最后加一些调试信息:
1 2 3 4 5 6 7 8 9 10 11 12 13 14 15 #define GLCall(x) GLClearError(); x; ASSERT(GLLogCall(#x, __FILE__, __LINE__)) ...... static bool GLLogCall (const char * function, const char * file, int line) while (GLenum error = glGetError ()) { std::cout << "[OpenGL Error] (" << error << "): " << function << " " << file << ":" << line << std::endl; return false ; } return true ; }
OpenGL中的统一变量
今天我们要讨论的是统一变量。
那么首先统一变量是一个非常单一的概念,它对于我们而言实际上是一种从 CPU 端获取数据的方式。在本例中是从 C++ 到我们的着色器,所以我们实际上把它当一个变量使用。
颜色变量 回到着色器我们创建一个 u_Color 并赋值:
1 2 3 4 5 6 7 8 9 10 11 12 #shader fragment #version 330 core layout(location = 0) out vec4 color; +uniform vec4 u_Color; void main() { - color = vec4(0.0, 0.2, 0.8, 1.0); + color = u_Color; }
每个统一变量都有一个 id,这样我们就可以引用它了。而我们查找 id 的方式通常是通过它的名称,所以我们基本上就是问我们的着色器 u_Color 变量的位置。
在更现代的 OpenGL 版本,你实际上可以设置和索引。所以从 4.3 开始你可以指定一个明确的统一变量位置,这是一种非常现代的新功能。
1 2 3 4 5 6 7 8 9 10 11 12 ShaderProgramSource source = ParseShader("res/shader/basic.shader"); unsigned int shader = CreateShader(source.VertexSource, source.FragmentSource); GLCall(glUseProgram(shader)); + GLCall(int location = glGetUniformLocation(shader, "u_Color")); + ASSERT(location != -1); + GLCall(glUniform4f(location, 0.2f, 0.3f, 0.8f, 1.0f)); /* Loop until the user closes the window */ while (!glfwWindowShouldClose(window)) { ......
总结一下,我通过使用实际的着色器 id 编写 glUseProgram() 绑定着色器,获取这个颜色变量的实际位置。而当我获取那个位置的时候,就调用 glUniform4f() 在着色器中设置我的数据。如果一切顺利,我应该将这个颜色值写入我的矩形每个像素的实际输出颜色:
可以看到我们得到了与之前完全相同的结果,为了区分明显一点修改颜色:
1 2 -GLCall(glUniform4f(location, 0.2f, 0.3f, 0.8f, 1.0f)); +GLCall(glUniform4f(location, 0.8f, 0.3f, 0.8f, 1.0f));
动态变化 好了,那么现在做点更令人兴奋的事情吧:让我们这个颜色动起来并且在渲染循环中随时间改变它。
1 2 3 4 5 6 7 8 9 10 11 12 13 14 15 16 17 18 19 20 21 22 23 24 25 26 27 28 29 30 + float r = 0.0f; + float increment = 0.05f; /* Loop until the user closes the window */ while (!glfwWindowShouldClose(window)) { /* Render here */ GLCall(glClear(GL_COLOR_BUFFER_BIT)); + GLCall(glUniform4f(location, r, 0.3f, 0.8f, 1.0f)); GLCall(glDrawElements(GL_TRIANGLES, 6, GL_UNSIGNED_INT, nullptr)); + if (r > 1.0f) + increment = -0.05f; + else if (r < 0.0f) + increment = 0.05f; + + r += increment; /* Swap front and back buffers */ glfwSwapBuffers(window); /* Poll for and events */ glfwPollEvents(); } GLCall(glDeleteProgram(shader)); glfwTerminate(); return 0; }
运行程序会发现颜色变化比较快,因为我们没有限制帧率:
1 2 3 4 /* Make the window's context current */ glfwMakeContextCurrent(window); + glfwSwapInterval(1);
该设置可以同步我们主频的帧率,得到更平滑的动画。
OpenGL中的顶点数组
今天我们会讲 OpenGL 的顶点数组。
顶点数组 我们讲了很多 OpenGL 的基本概念甚至一般的图形编程,但 OpenGL 实际上有一个顶点数组。乍一看你可能会说顶点数组、顶点缓冲区它们之间的区别是什么,它们听起来非常相似。确实如此,并且这并不是 DirectX 等其他渲染接口中真正存在的东西,它是 OpenGL 独有的,也可以说是 OpenGL 的一个原始接口。它们基本上是一种通过特定的规范绑定顶点缓冲区的方式,用于实际顶点缓冲区的布局。
在我们的代码中,我们创建了 buffer 包含所有的顶点数据,然后创建缓冲区之后也做了绑定,启用了顶点属性指定实际数据的布局。现在一个顶点数组对象允许我们通过 glVertexAttribArray() 绑定指定的顶点规范到实际的顶点缓冲区,可能对于 OpenGL 的初学者比较难以理解,如果屏幕上有多个对象、多个网格、多个顶点缓冲区,需要我们绑定顶点和索引缓冲区,然后绘制实际的对象。
但我们绑定顶点缓冲区之后,我们实际也需要指定布局,让我们看看解绑一切会发生什么:
1 2 3 4 5 6 7 8 9 10 11 GLCall(int location = glGetUniformLocation(shader, "u_Color")); ASSERT(location != -1); GLCall(glUniform4f(location, 0.8f, 0.3f, 0.8f, 1.0f)); + GLCall(glUseProgram(0)); + GLCall(glBindBuffer(GL_ARRAY_BUFFER, 0)); + GLCall(glBindBuffer(GL_ELEMENT_ARRAY_BUFFER, 0)); float r = 0.0f; float increment = 0.05f; /* Loop until the user closes the window */
这里我基本上解绑了所有的东西,到了绘制的时候我们需要实际上绑定我们需要的所有东西,让 DrawCall 工作以此正确渲染所有东西:
1 2 3 4 5 6 7 8 9 10 11 12 13 14 15 16 17 18 19 20 21 22 23 24 25 26 27 28 29 30 /* Loop until the user closes the window */ while (!glfwWindowShouldClose(window)) { /* Render here */ GLCall(glClear(GL_COLOR_BUFFER_BIT)); GLCall(glUseProgram(shader)); GLCall(glUniform4f(location, r, 0.3f, 0.8f, 1.0f)); + GLCall(glBindBuffer(GL_ARRAY_BUFFER, buffer)); + GLCall(glEnableVertexAttribArray(0)); + GLCall(glVertexAttribPointer(0, 2, GL_FLOAT, GL_FALSE, sizeof(float) * 2, 0)); + + GLCall(glBindBuffer(GL_ELEMENT_ARRAY_BUFFER, ibo)); + + GLCall(glDrawElements(GL_TRIANGLES, 6, GL_UNSIGNED_INT, nullptr)); if (r > 1.0f) increment = -0.05f; else if (r < 0.0f) increment = 0.05f; r += increment; /* Swap front and back buffers */ glfwSwapBuffers(window); /* Poll for and events */ glfwPollEvents(); }
我们绑定着色器,设置统一变量,绑定顶点缓冲区,设置顶点缓冲区的布局,最后绑定索引缓冲区调用 glDrawElements()。运行这段代码看看会发生什么:
得到了和之前一样的结果,完美。这里值得商榷的是这里:
1 2 GLCall (glEnableVertexAttribArray (0 ));GLCall (glVertexAttribPointer (0 , 2 , GL_FLOAT, GL_FALSE, sizeof (float ) * 2 , 0 ));
我们是否每次都要这样做?答案是肯定的,因为如果我们用不同的布局绘制另一个对象,它们可能已经改变了。所以顶点数组对象实际上就是包含这种状态的对象,因此如果我们正确地利用顶点数组对象例如为几何体的每个部分创建不同的顶点数组对象,然后只需要绑定顶点数组对象就完事儿了,因为顶点数组对象将包含顶点缓冲区之间的绑定、布局。
因此,我们的绘制方式从绑定我们的着色器、绑定我们的顶点缓冲区、设置顶点布局、绑定我们的索引缓冲区、然后发出实际的 DrawCall 指令变为了绑定我们的着色器、绑定顶点数组 、绑定索引缓冲区、最终发出实际的 DrawCall 指令。所以绑定顶点缓冲区并设置其布局变为了绑定顶点数组对象,因为它包含了我们实际需要的所有状态。
我需要在这里提一件事情,从技术上讲顶点数组对象是必须的,它们现在正在被使用,这就是为什么我说即使我们没有创建它们这个状态仍由顶点数组对象保持。这个东西是 OpenGL 兼容性配置文件,默认情况下兼容性配置文件实际上为我们创建了一个顶点数组对象。
然而,核心配置文件没有。所以我们实际上需要自己显式地创建一个 OpenGL 顶点数组对象,绑定它确保一切正常。如果我们正在使用核心配置文件,需要手动处理:
1 2 3 4 5 6 7 8 9 10 11 12 13 14 int main() { /* Initialize the library */ if (!glfwInit()) return -1; + glfwWindowHint(GLFW_CONTEXT_VERSION_MAJOR, 3); + glfwWindowHint(GLFW_CONTEXT_VERSION_MINOR, 3); + glfwWindowHint(GLFW_OPENGL_PROFILE, GLFW_OPENGL_CORE_PROFILE); /* Create a Windowed mode and its OpenGL context */ GLFWwindow* window = glfwCreateWindow(640, 480, "Hello World", NULL, NULL); ......
前两行确定 OpenGL 的主次版本为 3.3,后一行则设置我的 OpenGL 配置为核心配置文件 GLFW_OPENGL_CORE_PROFILE。
运行程序触发了断言,当我们尝试启用这个 vertexAttribArray 的时候没有绑定顶点数组对象,因此我们无法指定顶点属性类型的规范或者 enableVertexAttribArray。
那么我们需要做的就是在核心配置文件中实际创建那个 VAO,也就是顶点数组对象:
1 2 3 4 5 6 7 8 9 10 unsigned int indices[] = { 0, 1, 2, 2, 3, 0 }; + unsigned int vao; + GLCall(glGenVertexArrays(1, &vao)); + GLCall(glBindVertexArray(vao)); unsigned int buffer;
再次运行程序不再报错,这就是我们显式地创建一个 vao。有意思的是我们甚至可以删掉部分绑定的代码,程序依然可运行:
1 2 3 4 5 6 7 8 9 10 11 12 13 14 15 16 17 18 19 20 21 22 23 24 25 26 + GLCall(glBindVertexArray(0)); GLCall(glUseProgram(0)); GLCall(glBindBuffer(GL_ARRAY_BUFFER, 0)); GLCall(glBindBuffer(GL_ELEMENT_ARRAY_BUFFER, 0)); float r = 0.0f; float increment = 0.05f; /* Loop until the user closes the window */ while (!glfwWindowShouldClose(window)) { /* Render here */ GLCall(glClear(GL_COLOR_BUFFER_BIT)); GLCall(glUseProgram(shader)); GLCall(glUniform4f(location, r, 0.3f, 0.8f, 1.0f)); - GLCall(glBindBuffer(GL_ARRAY_BUFFER, buffer)); - GLCall(glEnableVertexAttribArray(0)); - GLCall(glVertexAttribPointer(0, 2, GL_FLOAT, GL_FALSE, sizeof(float) * 2, 0)); + GLCall(glBindVertexArray(vao)); GLCall(glBindBuffer(GL_ELEMENT_ARRAY_BUFFER, ibo)); GLCall(glDrawElements(GL_TRIANGLES, 6, GL_UNSIGNED_INT, nullptr)); ......
当我们绑定顶点数组和缓冲区的时候,实际上没有链接两者。但当我们指定这个 vertexAttribPointer 的时候,我们说的是这个顶点数组索引为 0 的位置将实际绑定到当前绑定的 GL_ARRAY_BUFFER 插槽。
应用策略 那么我们应该一直使用顶点数组对象吗?
答案是视情况而定。如果我们使用当前的核心配置文件,我们必须创建一个顶点数组的对象;如果我们只使用兼容性配置文件,这并不意味着没有顶点数组对象,这只意味着我们有一个默认的顶点数组对象,它被绑定并设置为供我们使用。
PlanA 是技术上你可以创造一个顶点数组对象,在你整个项目过程中都把它放在一边。因此始终有一个绑定的顶点数组对象,然后你可以在绘制几何体之前绑定一个顶点缓冲区并指定一个顶点布局。
PlanB 则是对于你创建的几何体的每一块创建一个顶点数组对象,然后指定那个规范一次,你就可以启用任何你需要的 vertexAttribArray 了,可以根据需要多次指定 glVertexAttribPointer() 把那些都设置好。然后在执行所有这些操作之前,你将看到绑定顶点缓冲区,到了绘制的时候只需每次绘制几何体之前绑定不同的顶点数组对象、将其绑定到索引缓冲区中,就可以调用 glDrawElements 或者任何绘制函数。
所以你可以在整个项目上有一个全局 VAO,然后每次绑定不同的缓冲区和不同的顶点规范;或者你对每个几何体都有单独的 VAO。哪一个更好,还是很难回答。
在很久之前 NVIDIA 做过研究全局 VAO 然后每次绑定一切速度更快。最近我没有做过相关的基准测试,但是我还是建议使用 VAO,OpenGL 也建议去使用它们。但这个世界很复杂,与理想情况下 VAO 的工作原理略有不同,所以我的建议是如果你真的关心性能需要从这一切中挤出最后一点性能,实际上你需要做一些测试,在你的环境中、你的平台上、你的设备中等等实际生产环境中进行尝试两种方案孰优孰劣。
抽象顶点索引缓冲区成类
错误处理类抽象 新建 Renderer.h 和 Renderer.cpp,将之前的错误处理代码放到新文件中。
1 2 3 4 5 6 7 8 9 #pragma once #include <GL/glew.h> #define ASSERT(x) if (!(x)) __debugbreak(); #define GLCall(x) GLClearError(); x; ASSERT(GLLogCall(#x, __FILE__, __LINE__)) void GLClearError () bool GLLogCall (const char * function, const char * file, int line)
Renderer.h 头文件包含了之前宏定义、断言以及函数的声明。
1 2 3 4 5 6 7 8 9 10 11 12 13 14 15 16 17 18 19 20 #include "Renderer.h" #include <iostream> void GLClearError () while (glGetError () != GL_NO_ERROR); } bool GLLogCall (const char * function, const char * file, int line) while (const GLenum error = glGetError ()) { std::cout << "[OpenGL Error] (" << error << "): " << function << " " << file << ":" << line << std::endl; return false ; } return true ; }
Renderer.cpp 则是函数的实现。
VertexBuffer类抽象 同理新建 VertexBuffer.h 和 VertexBuffer.cpp 两个文件。
1 2 3 4 5 6 7 8 9 10 11 12 13 14 15 #pragma once class VertexBuffer { private : unsigned int m_RendererID; public : VertexBuffer (const void * data, unsigned int size); ~VertexBuffer (); void Bind () const void Unbind () const };
其中 Vertexbuffer.h 包含一个成员变量 m_RendererID、构造函数、析构函数以及绑定/解绑函数的声明。
1 2 3 4 5 6 7 8 9 10 11 12 13 14 15 16 17 18 19 20 21 22 23 24 25 26 #include "VertexBuffer.h" #include "Renderer.h" VertexBuffer::VertexBuffer (const void * data, unsigned size) { GLCall (glGenBuffers (1 , &m_RendererID)) GLCall (glBindBuffer (GL_ARRAY_BUFFER, m_RendererID)) GLCall (glBufferData (GL_ARRAY_BUFFER, size, data, GL_STATIC_DRAW)) } VertexBuffer::~VertexBuffer () { GLCall (glDeleteBuffers (1 , &m_RendererID)) } void VertexBuffer::Bind () const GLCall (glBindBuffer (GL_ARRAY_BUFFER, m_RendererID)) } void VertexBuffer::Unbind () const GLCall (glBindBuffer (GL_ARRAY_BUFFER, 0 )) }
IndexBuffer类抽象 同理新建 IndexBuffer.h 和 IndexBuffer.cpp 两个文件。
1 2 3 4 5 6 7 8 9 10 11 12 13 14 15 16 17 #pragma once class IndexBuffer { private : unsigned int m_RendererID; unsigned int m_Count; public : IndexBuffer (const unsigned int * data, unsigned int count); ~IndexBuffer (); void Bind () const void Unbind () const inline unsigned int GetCount () const return m_Count; } };
其中 Indexbuffer.h 包含两个成员变量 m_RendererID m_Count、构造函数、析构函数以及绑定/解绑函数的声明。
1 2 3 4 5 6 7 8 9 10 11 12 13 14 15 16 17 18 19 20 21 22 23 24 25 26 27 28 #include "IndexBuffer.h" #include "Renderer.h" IndexBuffer::IndexBuffer (const unsigned int * data, unsigned int count) : m_Count (count) { ASSERT (sizeof (unsigned int ) == sizeof (GLuint)) GLCall (glGenBuffers (1 , &m_RendererID)) GLCall (glBindBuffer (GL_ELEMENT_ARRAY_BUFFER, m_RendererID)) GLCall (glBufferData (GL_ELEMENT_ARRAY_BUFFER, count * sizeof (unsigned int ), data, GL_STATIC_DRAW)) } IndexBuffer::~IndexBuffer () { GLCall (glDeleteBuffers (1 , &m_RendererID)) } void IndexBuffer::Bind () const GLCall (glBindBuffer (GL_ELEMENT_ARRAY_BUFFER, m_RendererID)) } void IndexBuffer::Unbind () const GLCall (glBindBuffer (GL_ELEMENT_ARRAY_BUFFER, 0 )) }
应用类 最终封装之后 Application.cpp 代码如下:
1 2 3 4 5 6 7 8 9 10 11 12 13 14 15 16 17 18 19 20 21 22 23 24 25 26 27 28 29 30 31 32 33 34 35 36 37 38 39 40 41 42 43 44 45 46 47 48 49 50 51 52 53 54 55 56 57 58 59 60 61 62 63 64 65 66 67 68 69 70 71 72 73 74 75 76 77 78 79 80 81 82 83 84 85 86 87 88 89 90 91 92 93 94 95 96 97 98 99 100 101 102 103 104 105 106 107 108 109 110 111 112 113 114 115 116 117 118 119 120 121 122 123 124 125 126 127 128 129 130 131 132 133 134 135 136 137 138 139 140 141 142 143 144 145 146 147 148 149 150 151 152 153 154 155 156 157 158 159 160 161 162 163 164 165 166 167 168 169 170 171 172 173 174 175 176 177 178 179 180 181 182 183 184 185 186 187 188 189 190 191 192 193 194 195 196 197 198 #include <iostream> #include <fstream> #include <string> #include <sstream> #include <GL/glew.h> #include <GLFW/glfw3.h> #include "Renderer.h" #include "VertexBuffer.h" #include "IndexBuffer.h" struct ShaderProgramSource { std::string VertexSource; std::string FragmentSource; }; static ShaderProgramSource ParseShader (const std::string& filepath) std::ifstream stream (filepath) ; enum class ShaderType { NONE = -1 , VERTEX = 0 , FRAGMENT = 1 }; std::string line; std::stringstream ss[2 ]; ShaderType type = ShaderType::NONE; while (getline (stream, line)) { if (line.find ("#shader" ) != std::string::npos) { if (line.find ("vertex" ) != std::string::npos) type = ShaderType::VERTEX; else if (line.find ("fragment" ) != std::string::npos) type = ShaderType::FRAGMENT; } else { ss[static_cast <int >(type)] << line << '\n' ; } } return { ss[0 ].str (), ss[1 ].str () }; } static unsigned int CompileShader (unsigned int type, const std::string& source) const unsigned int id = glCreateShader (type); const char * src = source.c_str (); GLCall (glShaderSource (id, 1 , &src, nullptr )) GLCall (glCompileShader (id)) int result; GLCall (glGetShaderiv (id, GL_COMPILE_STATUS, &result)) if (result == GL_FALSE) { int length; GLCall (glGetShaderiv (id, GL_INFO_LOG_LENGTH, &length)) char * message = static_cast <char *>(malloc (length * sizeof (char ))); GLCall (glGetShaderInfoLog (id, length, &length, message)) std::cout << "Failed to compile " << (type == GL_VERTEX_SHADER ? "vertex" : "fragment" ) << "shader!" << std::endl; std::cout << message << std::endl; GLCall (glDeleteShader (id)) return 0 ; } return id; } static unsigned int CreateShader (const std::string& vertexShader, const std::string& fragmentShader) const unsigned int program = glCreateProgram (); const unsigned int vs = CompileShader (GL_VERTEX_SHADER, vertexShader); const unsigned int fs = CompileShader (GL_FRAGMENT_SHADER, fragmentShader); GLCall (glAttachShader (program, vs)) GLCall (glAttachShader (program, fs)) GLCall (glLinkProgram (program)) GLCall (glValidateProgram (program)) GLCall (glDeleteShader (vs)) GLCall (glDeleteShader (fs)) return program; } int main () if (!glfwInit ()) return -1 ; glfwWindowHint (GLFW_CONTEXT_VERSION_MAJOR, 3 ); glfwWindowHint (GLFW_CONTEXT_VERSION_MINOR, 3 ); glfwWindowHint (GLFW_OPENGL_PROFILE, GLFW_OPENGL_CORE_PROFILE); GLFWwindow* window = glfwCreateWindow (640 , 480 , "Hello World" , nullptr , nullptr ); if (!window) { GLCall (glfwTerminate ()) return -1 ; } glfwMakeContextCurrent (window); glfwSwapInterval (1 ); if (glewInit () != GLEW_OK) std::cout << "Error!" << std::endl; std::cout << glGetString (GL_VERSION) << std::endl; constexpr float positions[] = { -0.5f , -0.5f , 0.5f , -0.5f , 0.5f , 0.5f , -0.5f , 0.5f }; const unsigned int indices[] = { 0 , 1 , 2 , 2 , 3 , 0 }; unsigned int vao; GLCall (glGenVertexArrays (1 , &vao)) GLCall (glBindVertexArray (vao)) VertexBuffer vb (positions, static_cast <unsigned long long >(4 ) * 2 * sizeof (float )) ; GLCall (glEnableVertexAttribArray (0 )) GLCall (glVertexAttribPointer (0 , 2 , GL_FLOAT, GL_FALSE, sizeof (float ) * 2 , nullptr )) const IndexBuffer ib (indices, 6 ) const ShaderProgramSource source = ParseShader ("res/shader/basic.shader" ); unsigned const int shader = CreateShader (source.VertexSource, source.FragmentSource); GLCall (glUseProgram (shader)) GLCall (const int location = glGetUniformLocation (shader, "u_Color" )) ASSERT (location != -1 ) GLCall (glUniform4f (location, 0.8f , 0.3f , 0.8f , 1.0f )) GLCall (glBindVertexArray (0 )) GLCall (glUseProgram (0 )) GLCall (glBindBuffer (GL_ARRAY_BUFFER, 0 )) GLCall (glBindBuffer (GL_ELEMENT_ARRAY_BUFFER, 0 )) float r = 0.0f ; float increment = 0.05f ; while (!glfwWindowShouldClose (window)) { GLCall (glClear (GL_COLOR_BUFFER_BIT)) GLCall (glUseProgram (shader)) GLCall (glUniform4f (location, r, 0.3f , 0.8f , 1.0f )) GLCall (glBindVertexArray (vao)) ib.Bind (); GLCall (glDrawElements (GL_TRIANGLES, 6 , GL_UNSIGNED_INT, nullptr )) if (r > 1.0f ) increment = -0.05f ; else if (r < 0.0f ) increment = 0.05f ; r += increment; glfwSwapBuffers (window); glfwPollEvents (); } GLCall (glDeleteProgram (shader)) glfwTerminate (); return 0 ; }
OpenGL中的缓冲区和布局的抽象
首先我们抽象顶点数组的目的是什么?
对我们来说,顶点数组需要做的是将顶点缓冲区与某种布局联系在一起,所以顶点缓冲区就是有数据的缓冲区,它们没有实际的概念比如前三个浮点数是位置,没有类型或者大小之类的概念,它只是实际数据的普通缓冲区。每个字节是什么、这些顶点有多大等等才是顶点数组真正代表的,它应该把缓冲区和实际布局联系在一起。
顶点数组对象是 OpenGL 存储那种状态的方式,那么当我们考虑创建这个接口时,我们需要做的是需要一些东西来创建一个顶点数组。
顶点数组布局类 新建顶点数组布局类 VertexBufferLayout.h:
1 2 3 4 5 6 7 8 9 10 11 12 13 14 15 16 17 18 19 20 21 22 23 24 25 26 27 28 29 30 31 32 33 34 35 36 37 38 39 40 41 42 43 44 45 46 47 48 49 50 51 52 53 54 55 56 57 58 59 60 61 62 63 64 65 66 67 #pragma once #include <vector> #include <GL/glew.h> #include "Renderer.h" struct VertexBufferElement { unsigned int type; unsigned int count; unsigned char normalized; static unsigned int GetSizeOfType (unsigned int type) { switch (type) { case GL_FLOAT: return 4 ; case GL_UNSIGNED_INT: return 4 ; case GL_UNSIGNED_BYTE: return 1 ; } ASSERT (false ) return 0 ; } }; class VertexBufferLayout { private : unsigned int m_Stride; std::vector<VertexBufferElement> m_Elements; public : VertexBufferLayout () : m_Stride (0 ) {} template <typename T> void Push (unsigned int count) { } template <> void Push <float >(unsigned int count) { m_Elements.push_back ({ GL_FLOAT, count, GL_FALSE }); m_Stride += count * VertexBufferElement::GetSizeOfType (GL_FLOAT); } template <> void Push <unsigned int >(unsigned int count) { m_Elements.push_back ({ GL_UNSIGNED_INT, count, GL_FALSE }); m_Stride += count * VertexBufferElement::GetSizeOfType (GL_UNSIGNED_INT); } template <> void Push <unsigned char >(unsigned int count) { m_Elements.push_back ({ GL_UNSIGNED_BYTE, count, GL_TRUE }); m_Stride += count * VertexBufferElement::GetSizeOfType (GL_UNSIGNED_BYTE); } inline unsigned int GetStride () const return m_Stride; } inline std::vector<VertexBufferElement> GetElements () const return m_Elements; } };
顶点数组类抽象 新建 VertexArray.h 和 VertexArray.cpp:
1 2 3 4 5 6 7 8 9 10 11 12 13 14 15 16 17 18 #pragma once #include "VertexBuffer.h" #include "VertexBufferLayout.h" class VertexArray { private : unsigned int m_RendererID; public : VertexArray (); ~VertexArray (); void Bind () const void Unbind () const void AddBuffer (const VertexBuffer& vb, const VertexBufferLayout& layout) };
头文件包含了成员变量 m_RendererID、构造函数、析构函数、缓冲区添加函数以及绑定/解绑函数的声明。
1 2 3 4 5 6 7 8 9 10 11 12 13 14 15 16 17 18 19 20 21 22 23 24 25 26 27 28 29 30 31 32 33 34 35 36 37 38 39 40 41 42 43 44 45 46 47 #include "VertexArray.h" #include "Renderer.h" VertexArray::VertexArray () { GLCall (glGenVertexArrays (1 , &m_RendererID)) } VertexArray::~VertexArray () { GLCall (glDeleteVertexArrays (1 , &m_RendererID)) } void VertexArray::Bind () const GLCall (glBindVertexArray (m_RendererID)) } void VertexArray::Unbind () const GLCall (glBindVertexArray (0 )) } void VertexArray::AddBuffer (const VertexBuffer& vb, const VertexBufferLayout& layout) Bind (); vb.Bind (); unsigned int offset = 0 ; const auto & elements = layout.GetElements (); for (unsigned int i = 0 ; i < elements.size (); i++) { const auto & element = elements[i]; GLCall (glEnableVertexAttribArray (i)) GLCall (glVertexAttribPointer (i, element.count, element.type, element.normalized, layout.GetStride (), (const void *)offset)) offset += element.count * VertexBufferElement::GetSizeOfType (element.type); } }
应用类 最后用封装好的类替换之前 Application.cpp 中的代码:
1 2 3 4 5 6 7 8 9 10 11 12 13 14 15 16 17 18 19 20 21 22 23 24 25 26 27 28 29 30 31 32 33 34 35 36 37 38 39 40 41 42 43 44 45 46 47 48 49 50 51 52 53 54 55 56 57 58 59 60 61 62 63 64 65 66 67 68 69 70 71 72 73 74 75 76 77 78 79 80 81 82 83 84 85 86 87 88 89 90 91 92 93 94 95 96 97 98 99 100 101 102 103 104 105 106 107 108 109 110 111 112 113 114 115 116 117 118 119 120 121 122 123 124 125 126 127 128 129 130 131 132 133 134 135 136 137 138 139 140 141 142 143 144 145 146 147 148 149 150 151 152 153 154 155 156 157 158 159 160 161 162 163 164 165 166 167 168 169 170 171 172 173 174 175 176 177 178 179 180 181 182 183 184 185 186 187 188 189 190 191 192 193 194 195 196 197 198 199 200 #include <iostream> #include <fstream> #include <string> #include <sstream> #include <GL/glew.h> #include <GLFW/glfw3.h> #include "Renderer.h" #include "VertexBuffer.h" #include "IndexBuffer.h" #include "VertexArray.h" struct ShaderProgramSource { std::string VertexSource; std::string FragmentSource; }; static ShaderProgramSource ParseShader (const std::string& filepath) std::ifstream stream (filepath) ; enum class ShaderType { NONE = -1 , VERTEX = 0 , FRAGMENT = 1 }; std::string line; std::stringstream ss[2 ]; ShaderType type = ShaderType::NONE; while (getline (stream, line)) { if (line.find ("#shader" ) != std::string::npos) { if (line.find ("vertex" ) != std::string::npos) type = ShaderType::VERTEX; else if (line.find ("fragment" ) != std::string::npos) type = ShaderType::FRAGMENT; } else { ss[static_cast <int >(type)] << line << '\n' ; } } return { ss[0 ].str (), ss[1 ].str () }; } static unsigned int CompileShader (unsigned int type, const std::string& source) const unsigned int id = glCreateShader (type); const char * src = source.c_str (); GLCall (glShaderSource (id, 1 , &src, nullptr )) GLCall (glCompileShader (id)) int result; GLCall (glGetShaderiv (id, GL_COMPILE_STATUS, &result)) if (result == GL_FALSE) { int length; GLCall (glGetShaderiv (id, GL_INFO_LOG_LENGTH, &length)) char * message = static_cast <char *>(malloc (length * sizeof (char ))); GLCall (glGetShaderInfoLog (id, length, &length, message)) std::cout << "Failed to compile " << (type == GL_VERTEX_SHADER ? "vertex" : "fragment" ) << "shader!" << std::endl; std::cout << message << std::endl; GLCall (glDeleteShader (id)) return 0 ; } return id; } static unsigned int CreateShader (const std::string& vertexShader, const std::string& fragmentShader) const unsigned int program = glCreateProgram (); const unsigned int vs = CompileShader (GL_VERTEX_SHADER, vertexShader); const unsigned int fs = CompileShader (GL_FRAGMENT_SHADER, fragmentShader); GLCall (glAttachShader (program, vs)) GLCall (glAttachShader (program, fs)) GLCall (glLinkProgram (program)) GLCall (glValidateProgram (program)) GLCall (glDeleteShader (vs)) GLCall (glDeleteShader (fs)) return program; } int main () if (!glfwInit ()) return -1 ; glfwWindowHint (GLFW_CONTEXT_VERSION_MAJOR, 3 ); glfwWindowHint (GLFW_CONTEXT_VERSION_MINOR, 3 ); glfwWindowHint (GLFW_OPENGL_PROFILE, GLFW_OPENGL_CORE_PROFILE); GLFWwindow* window = glfwCreateWindow (640 , 480 , "Hello World" , nullptr , nullptr ); if (!window) { GLCall (glfwTerminate ()) return -1 ; } glfwMakeContextCurrent (window); glfwSwapInterval (1 ); if (glewInit () != GLEW_OK) std::cout << "Error!" << std::endl; std::cout << glGetString (GL_VERSION) << std::endl; { constexpr float positions[] = { -0.5f , -0.5f , 0.5f , -0.5f , 0.5f , 0.5f , -0.5f , 0.5f }; const unsigned int indices[] = { 0 , 1 , 2 , 2 , 3 , 0 }; unsigned int vao; GLCall (glGenVertexArrays (1 , &vao)) GLCall (glBindVertexArray (vao)) VertexArray va; const VertexBuffer vb (positions, static_cast <unsigned long long >(4 ) * 2 * sizeof (float )) VertexBufferLayout layout; layout.Push <float >(2 ); va.AddBuffer (vb, layout); const IndexBuffer ib (indices, 6 ) const ShaderProgramSource source = ParseShader ("res/shader/basic.shader" ); unsigned const int shader = CreateShader (source.VertexSource, source.FragmentSource); GLCall (glUseProgram (shader)) GLCall (const int location = glGetUniformLocation (shader, "u_Color" )) ASSERT (location != -1 ) GLCall (glUniform4f (location, 0.8f , 0.3f , 0.8f , 1.0f )) GLCall (glBindVertexArray (0 )) GLCall (glUseProgram (0 )) GLCall (glBindBuffer (GL_ARRAY_BUFFER, 0 )) GLCall (glBindBuffer (GL_ELEMENT_ARRAY_BUFFER, 0 )) float r = 0.0f ; float increment = 0.05f ; while (!glfwWindowShouldClose (window)) { GLCall (glClear (GL_COLOR_BUFFER_BIT)) GLCall (glUseProgram (shader)) GLCall (glUniform4f (location, r, 0.3f , 0.8f , 1.0f )) va.Bind (); ib.Bind (); GLCall (glDrawElements (GL_TRIANGLES, 6 , GL_UNSIGNED_INT, nullptr )) if (r > 1.0f ) increment = -0.05f ; else if (r < 0.0f ) increment = 0.05f ; r += increment; glfwSwapBuffers (window); glfwPollEvents (); } GLCall (glDeleteProgram (shader)) } glfwTerminate (); return 0 ; }
OpenG中抽象着色器
着色器需要什么?
第一步首先我们希望能够传递一个文件或者字符串,把它作为着色器来编译;第二步我们希望能够绑定和解绑着色器;第三步则是我们需要能够设置着色器中各种不同的统一变量,这可能就是我们现在正在研究的东西。
着色器抽象 那么,让我们开始深入重构代码吧。
新建文件 Shader.h 和 Shader.cpp 抽象着色器类。
1 2 3 4 5 6 7 8 9 10 11 12 13 14 15 16 17 18 19 20 21 22 23 24 25 26 27 28 29 30 31 32 33 34 #pragma once #include <string> #include <unordered_map> struct ShaderProgramSource { std::string VertexSource; std::string FragmentSource; }; class Shader { private : std::string m_FilePath; unsigned int m_RendererID; std::unordered_map<std::string, int > m_UniformLocationCache; public : Shader (const std::string& filepath); ~Shader (); void Bind () const void Unbind () const void SetUniform4f (const std::string& name, float v0, float v1, float v2, float v3) private : ShaderProgramSource ParseShader (const std::string& filepath) const ; unsigned int CompileShader (unsigned int type, const std::string& source) unsigned int CreateShader (const std::string& vertexShader, const std::string& fragmentShader) unsigned int GetUniformLocation (const std::string& name) };
1 2 3 4 5 6 7 8 9 10 11 12 13 14 15 16 17 18 19 20 21 22 23 24 25 26 27 28 29 30 31 32 33 34 35 36 37 38 39 40 41 42 43 44 45 46 47 48 49 50 51 52 53 54 55 56 57 58 59 60 61 62 63 64 65 66 67 68 69 70 71 72 73 74 75 76 77 78 79 80 81 82 83 84 85 86 87 88 89 90 91 92 93 94 95 96 97 98 99 100 101 102 103 104 105 106 107 108 109 110 111 112 113 114 115 116 117 118 119 120 121 122 123 #include "Shader.h" #include <iostream> #include <fstream> #include <sstream> #include "Renderer.h" Shader::Shader (const std::string& filepath) : m_FilePath (filepath), m_RendererID (0 ) { const ShaderProgramSource source = ParseShader (filepath); m_RendererID = CreateShader (source.VertexSource, source.FragmentSource); } Shader::~Shader () { GLCall (glDeleteProgram (m_RendererID)) } void Shader::Bind () const GLCall (glUseProgram (m_RendererID)) } void Shader::Unbind () const GLCall (glUseProgram (0 )) } void Shader::SetUniform4f (const std::string& name, float v0, float v1, float v2, float v3) GLCall (glUniform4f (GetUniformLocation (name), v0, v1, v2, v3)) } unsigned int Shader::GetUniformLocation (const std::string& name) if (m_UniformLocationCache.find (name) != m_UniformLocationCache.end ()) return m_UniformLocationCache[name]; GLCall (const int location = glGetUniformLocation (m_RendererID, name.c_str ())) if (location == -1 ) std::cout << "Warning: uniform '" << name << "' doesn't exist!" << std::endl; return location; } ShaderProgramSource Shader::ParseShader (const std::string& filepath) const std::ifstream stream (filepath) ; enum class ShaderType { NONE = -1 , VERTEX = 0 , FRAGMENT = 1 }; std::string line; std::stringstream ss[2 ]; ShaderType type = ShaderType::NONE; while (getline (stream, line)) { if (line.find ("#shader" ) != std::string::npos) { if (line.find ("vertex" ) != std::string::npos) type = ShaderType::VERTEX; else if (line.find ("fragment" ) != std::string::npos) type = ShaderType::FRAGMENT; } else { ss[static_cast <int >(type)] << line << '\n' ; } } return { ss[0 ].str (), ss[1 ].str () }; } unsigned int Shader::CompileShader (unsigned int type, const std::string& source) const unsigned int id = glCreateShader (type); const char * src = source.c_str (); GLCall (glShaderSource (id, 1 , &src, nullptr )) GLCall (glCompileShader (id)) int result; GLCall (glGetShaderiv (id, GL_COMPILE_STATUS, &result)) if (result == GL_FALSE) { int length; GLCall (glGetShaderiv (id, GL_INFO_LOG_LENGTH, &length)) char * message = static_cast <char *>(malloc (length * sizeof (char ))); GLCall (glGetShaderInfoLog (id, length, &length, message)) std::cout << "Failed to compile " << (type == GL_VERTEX_SHADER ? "vertex" : "fragment" ) << "shader!" << std::endl; std::cout << message << std::endl; GLCall (glDeleteShader (id)) return 0 ; } return id; } unsigned int Shader::CreateShader (const std::string& vertexShader, const std::string& fragmentShader) const unsigned int program = glCreateProgram (); const unsigned int vs = CompileShader (GL_VERTEX_SHADER, vertexShader); const unsigned int fs = CompileShader (GL_FRAGMENT_SHADER, fragmentShader); GLCall (glAttachShader (program, vs)) GLCall (glAttachShader (program, fs)) GLCall (glLinkProgram (program)) GLCall (glValidateProgram (program)) GLCall (glDeleteShader (vs)) GLCall (glDeleteShader (fs)) return program; }
应用类 1 2 3 4 5 6 7 8 9 10 11 12 13 14 15 16 17 18 19 20 21 22 23 24 25 26 27 28 29 30 31 32 33 34 35 36 37 38 39 40 41 42 43 44 45 46 47 48 49 50 51 52 53 54 55 56 57 58 59 60 61 62 63 64 65 66 67 68 69 70 71 72 73 74 75 76 77 78 79 80 81 82 83 84 85 86 87 88 89 90 91 92 93 94 95 96 97 98 99 100 101 102 103 104 105 106 107 108 #include <iostream> #include <fstream> #include <GL/glew.h> #include <GLFW/glfw3.h> #include "Renderer.h" #include "VertexBuffer.h" #include "IndexBuffer.h" #include "VertexArray.h" #include "Shader.h" int main () if (!glfwInit ()) return -1 ; glfwWindowHint (GLFW_CONTEXT_VERSION_MAJOR, 3 ); glfwWindowHint (GLFW_CONTEXT_VERSION_MINOR, 3 ); glfwWindowHint (GLFW_OPENGL_PROFILE, GLFW_OPENGL_CORE_PROFILE); GLFWwindow* window = glfwCreateWindow (640 , 480 , "Hello World" , nullptr , nullptr ); if (!window) { GLCall (glfwTerminate ()) return -1 ; } glfwMakeContextCurrent (window); glfwSwapInterval (1 ); if (glewInit () != GLEW_OK) std::cout << "Error!" << std::endl; std::cout << glGetString (GL_VERSION) << std::endl; constexpr float positions[] = { -0.5f , -0.5f , 0.5f , -0.5f , 0.5f , 0.5f , -0.5f , 0.5f }; const unsigned int indices[] = { 0 , 1 , 2 , 2 , 3 , 0 }; unsigned int vao; GLCall (glGenVertexArrays (1 , &vao)) GLCall (glBindVertexArray (vao)) VertexArray va; const VertexBuffer vb (positions, static_cast <unsigned long long >(4 ) * 2 * sizeof (float )) VertexBufferLayout layout; layout.Push <float >(2 ); va.AddBuffer (vb, layout); const IndexBuffer ib (indices, 6 ) Shader shader ("res/shader/basic.shader" ) ; shader.Bind (); shader.SetUniform4f ("u_Color" , 0.8f , 0.3f , 0.8f , 1.0f ); va.Unbind (); shader.Unbind (); vb.Unbind (); ib.Unbind (); float r = 0.0f ; float increment = 0.05f ; while (!glfwWindowShouldClose (window)) { GLCall (glClear (GL_COLOR_BUFFER_BIT)) shader.Bind (); shader.SetUniform4f ("u_Color" , r, 0.3f , 0.8f , 1.0f ); va.Bind (); ib.Bind (); GLCall (glDrawElements (GL_TRIANGLES, 6 , GL_UNSIGNED_INT, nullptr )) if (r > 1.0f ) increment = -0.05f ; else if (r < 0.0f ) increment = 0.05f ; r += increment; glfwSwapBuffers (window); glfwPollEvents (); } glfwTerminate (); return 0 ; }
OpenGL写一个基础的渲染器类
今天我们的目标是剔除在主文件中遗留的 OpenGL 调用。
虽然前面几节我们用 VertexBuffer、IndexBuffer、VertexArray、Shader 等类抽象 OpenGL 代码,但是还有相当一部分遗留在 Application.cpp 中,例如 DrawCall 指令。
1 2 3 4 5 6 7 8 9 10 11 12 13 14 15 16 17 18 19 20 #pragma once #include <GL/glew.h> +#include "VertexArray.h" +#include "IndexBuffer.h" +#include "Shader.h" #define ASSERT(x) if (!(x)) __debugbreak(); #define GLCall(x) GLClearError(); x; ASSERT(GLLogCall(#x, __FILE__, __LINE__)) void GLClearError(); bool GLLogCall(const char* function, const char* file, int line); +class Renderer +{ +public: + void Clear() const; + void Draw(const VertexArray& va, const IndexBuffer& ib,const Shader& shader) const; +};
让我们想一想,在 OpenGL 绘制一些东西我们实际需要什么。我们需要顶点数组和索引缓冲区以及着色器,顶点数组实际已经绑定了顶点缓冲区,
1 2 3 4 5 6 7 8 9 10 11 12 13 14 15 void Renderer::Clear () const GLCall (glClear (GL_COLOR_BUFFER_BIT)) } void Renderer::Draw (const VertexArray& va, const IndexBuffer& ib, const Shader& shader) const shader.Bind (); shader.SetUniform4f ("u_Color" , r, 0.3f , 0.8f , 1.0f ); va.Bind (); ib.Bind (); GLCall (glDrawElements (GL_TRIANGLES, ib.GetCount (), GL_UNSIGNED_INT, nullptr )) }
复制完 Application.cpp 中的绑定代码后并不打算解绑。在更传统的情况下,OpenGL 中解绑不是严格必要的,它可能会减少一些 bug,但从根本上来说在 OpenGL 中解绑东西只是浪费性能,你不需要这么做,因为在我们绘制下一个东西之前我们会把这些东西都绑定起来,所以解绑没有意义。更复杂的系统可能会在调试模式下会有解绑,但暂时我们还是简单处理。
1 2 3 4 5 6 7 8 9 10 11 12 13 14 15 16 17 18 19 20 21 22 23 24 25 26 27 28 29 30 31 32 33 34 35 36 37 38 39 40 41 42 43 44 45 46 47 48 49 50 51 52 53 54 55 56 57 58 59 60 61 62 63 64 65 66 67 68 69 70 71 72 73 74 75 76 77 78 79 80 81 82 83 84 85 86 87 88 89 90 91 92 93 94 95 96 97 98 99 100 101 102 103 104 105 106 107 108 109 110 111 #include <iostream> #include <fstream> #include <GL/glew.h> #include <GLFW/glfw3.h> #include "Renderer.h" #include "VertexBuffer.h" #include "IndexBuffer.h" #include "VertexArray.h" #include "Shader.h" int main() { /* Initialize the library */ if (!glfwInit()) return -1; glfwWindowHint(GLFW_CONTEXT_VERSION_MAJOR, 3); glfwWindowHint(GLFW_CONTEXT_VERSION_MINOR, 3); glfwWindowHint(GLFW_OPENGL_PROFILE, GLFW_OPENGL_CORE_PROFILE); /* Create a Windowed mode and its OpenGL context */ GLFWwindow* window = glfwCreateWindow(640, 480, "Hello World", nullptr, nullptr); if (!window) { GLCall(glfwTerminate()) return -1; } /* Make the window's context current */ glfwMakeContextCurrent(window); glfwSwapInterval(1); if (glewInit() != GLEW_OK) std::cout << "Error!" << std::endl; std::cout << glGetString(GL_VERSION) << std::endl; constexpr float positions[] = { -0.5f, -0.5f, // 0 0.5f, -0.5f, // 1 0.5f, 0.5f, // 2 -0.5f, 0.5f // 3 }; const unsigned int indices[] = { 0, 1, 2, 2, 3, 0 }; unsigned int vao; GLCall(glGenVertexArrays(1, &vao)) GLCall(glBindVertexArray(vao)) VertexArray va; const VertexBuffer vb(positions, static_cast<unsigned long long>(4) * 2 * sizeof(float)); VertexBufferLayout layout; layout.Push<float>(2); va.AddBuffer(vb, layout); const IndexBuffer ib(indices, 6); Shader shader("res/shader/basic.shader"); shader.Bind(); shader.SetUniform4f("u_Color", 0.8f, 0.3f, 0.8f, 1.0f); va.Unbind(); shader.Unbind(); vb.Unbind(); ib.Unbind(); + Renderer renderer; float r = 0.0f; float increment = 0.05f; /* Loop until the user closes the window */ while (!glfwWindowShouldClose(window)) { /* Render here */ + renderer.Clear(); - GLCall(glClear(GL_COLOR_BUFFER_BIT)) shader.Bind(); shader.SetUniform4f("u_Color", r, 0.3f, 0.8f, 1.0f); - va.Bind(); - ib.Bind(); - GLCall(glDrawElements(GL_TRIANGLES, 6, GL_UNSIGNED_INT, nullptr)) if (r > 1.0f) increment = -0.05f; else if (r < 0.0f) increment = 0.05f; r += increment; /* Swap front and back buffers */ glfwSwapBuffers(window); /* Poll for and events */ glfwPollEvents(); } glfwTerminate(); return 0; }
OpenGL中的纹理
今天我们会讨论 OpenGL 中的纹理。
纹理 当大部分人想到纹理的时候,他们真的只会想到在一个游戏中的 3D 对象上呈现图像(当然不一定非得是 3D 对象)。而你们在 Ps 或画图等等中创建的图像,让它出现在你们的图形应用程序中,那就是纹理的本质,或者至少是大部分人眼中的纹理。
现在,除了这些,关于纹理的理解比我刚才描述的要多得多。纹理可以用于很多事情,当后面讲到一些非常复杂的图形技术时我们会提到,但现在我只想让你们把纹理看作当渲染时是我们可以使用的图像。那么我实际能做的就是设计或创造某种图像,不管是一张照片还是画布上一条弯弯曲曲的线亦或是纯色以及任意类似的颜色,我都可以在我的电脑中创建任何图像文件,然后把它上传到我的显存中,然后在我的着色器中使用它来绘制我现在正在做的任何东西。
这可能像在我们的 OpenGL 程序中画一个矩形一样简单,它包含了渲染纹理的元素,这样我们就可以在游戏中看到纹理。或者也可能是更复杂的东西,就像使用预先计算好的数学值将其融入到我们的纹理中,然后在着色器中对它们进行采样,这样我们可以做一些很酷的灯光效果。但现在,它只会在 OpenGL 应用中从计算机获取图像到表面。
第三方库 回到项目,添加 res/textures/Checkerboard.png:
首先我们需要以某种方式将 PNG 图像加载到 CPU 内存中,可以使用 stb_image 库加载 PNG。我们给它一个文件路径,它会给我们一个指向 RGBA 像素缓冲区的指针;然后我们会取那个像素数组把它上传到我们的显卡;最后当它绘制时就可以修改着色器来读取那个纹理,片段着色器实际计算出每个像素应该是什么,构成那个纹理每部分的颜色是什么。
复制 stb_image.h 中的代码到项目的 vendor/stb_images/stb_image.h。新建 stb_image.cpp:
1 2 3 #define STB_IMAGE_IMPLEMENTATION #include "stb_image.h"
纹理类抽象 新建文件 Texture.h 和 Texture.cpp:
1 2 3 4 5 6 7 8 9 10 11 12 13 14 15 16 17 18 19 20 21 #pragma once #include "Renderer.h" class Texture { private : std::string m_FilePath; unsigned int m_RendererID; unsigned char m_LocalBuffer; int m_Width, m_Height, m_BPP; public : Texture (const std::string& path); ~Texture (); void Bind (unsigned int slot = 0 ) const void Unbind () const inline int GetWidth () const return m_Width; } inline int GetHeight () const return m_Height; } }
slot 就是绑定纹理的插槽。在 OpenGL 我们有各种各样的插槽可以绑定纹理,Windows 上经典的现代显卡会有 32 个纹理插槽,而在诸如安卓等移动设备上可能有八个插槽,这取决于你们的实际显卡以及它们的 OpenGL 实现。
1 2 3 4 5 6 7 8 9 10 11 12 13 14 15 16 17 18 19 20 21 22 23 24 25 26 27 28 29 30 31 32 33 34 35 36 37 38 39 40 41 42 #include "Texture.h" #include "vendor/stb_images/stb_image.h" Texture::Texture (const std::string& path) : m_FilePath (path), m_RendererID (0 ), m_LocalBuffer (nullptr ), m_Width (0 ), m_Height (0 ), m_BPP (0 ) { stbi_set_flip_vertically_on_load (1 ); m_LocalBuffer = stbi_load (path.c_str (), &m_Width, &m_Height, &m_BPP, 4 ); GLCall (glGenTextures (1 , &m_RendererID)) GLCall (glBindTexture (GL_TEXTURE_2D, m_RendererID)) GLCall (glTexParameteri (GL_TEXTURE_2D, GL_TEXTURE_MIN_FILTER, GL_LINEAR)) GLCall (glTexParameteri (GL_TEXTURE_2D, GL_TEXTURE_MAG_FILTER, GL_LINEAR)) GLCall (glTexParameteri (GL_TEXTURE_2D, GL_TEXTURE_WRAP_S, GL_CLAMP_TO_EDGE)) GLCall (glTexParameteri (GL_TEXTURE_2D, GL_TEXTURE_WRAP_T, GL_CLAMP_TO_EDGE)) GLCall (glTexImage2D (GL_TEXTURE_2D, 0 , GL_RGBA8, m_Width, m_Height, 0 , GL_RGBA, GL_UNSIGNED_BYTE, m_LocalBuffer)) GLCall (glBindTexture (GL_TEXTURE_2D, 0 )) if (m_LocalBuffer) stbi_image_free (m_LocalBuffer); } Texture::~Texture () { GLCall (glDeleteTextures (1 , &m_RendererID)) } void Texture::Bind (unsigned int slot) const GLCall (glActiveTexture (GL_TEXTURE0 + slot)) GLCall (glBindTexture (GL_TEXTURE_2D, m_RendererID)) } void Texture::Unbind () const GLCall (glBindTexture (GL_TEXTURE_2D, 0 )) }
stbi_set_flip_vertically_on_load(1) 用于垂直翻转我们的纹理,OpenGL 希望我们的纹理像素从左下角开始。glTexParameteri(...) 用于纹理比实际大或者小时,需要放大或者缩小
应用类 回到 Application.cpp 加入纹理:
1 2 3 4 5 6 7 8 9 10 11 12 13 14 15 16 17 18 19 20 21 22 23 24 25 26 27 28 29 30 31 32 33 34 35 36 37 38 39 40 41 42 43 44 45 46 47 48 49 50 51 52 53 54 55 56 57 58 59 60 61 62 63 64 65 66 67 68 69 70 71 72 73 74 75 76 77 78 79 80 81 82 83 84 85 86 87 88 89 90 91 92 93 94 95 96 97 98 99 100 101 102 103 104 105 106 107 108 109 110 111 112 113 114 115 116 117 118 #include <iostream> #include <fstream> #include <GL/glew.h> #include <GLFW/glfw3.h> #include "Renderer.h" #include "VertexBuffer.h" #include "VertexBufferLayout.h" #include "IndexBuffer.h" #include "VertexArray.h" #include "Shader.h" #include "Texture.h" int main () if (!glfwInit ()) return -1 ; glfwWindowHint (GLFW_CONTEXT_VERSION_MAJOR, 3 ); glfwWindowHint (GLFW_CONTEXT_VERSION_MINOR, 3 ); glfwWindowHint (GLFW_OPENGL_PROFILE, GLFW_OPENGL_CORE_PROFILE); GLFWwindow* window = glfwCreateWindow (640 , 480 , "Hello World" , nullptr , nullptr ); if (!window) { GLCall (glfwTerminate ()) return -1 ; } glfwMakeContextCurrent (window); glfwSwapInterval (1 ); if (glewInit () != GLEW_OK) std::cout << "Error!" << std::endl; std::cout << glGetString (GL_VERSION) << std::endl; constexpr float positions[] = { -0.5f , -0.5f , 0.0f , 0.0f , 0.5f , -0.5f , 1.0f , 0.0f , 0.5f , 0.5f , 1.0f , 1.0f , -0.5f , 0.5f , 0.0f , 1.0f }; const unsigned int indices[] = { 0 , 1 , 2 , 2 , 3 , 0 }; GLCall (glEnable (GL_BLEND)) GLCall (glBlendFunc (GL_SRC_ALPHA, GL_ONE_MINUS_SRC_ALPHA)) unsigned int vao; GLCall (glGenVertexArrays (1 , &vao)) GLCall (glBindVertexArray (vao)) VertexArray va; const VertexBuffer vb (positions, static_cast <unsigned long long >(4 ) * 4 * sizeof (float )) VertexBufferLayout layout; layout.Push <float >(2 ); layout.Push <float >(2 ); va.AddBuffer (vb, layout); const IndexBuffer ib (indices, 6 ) Shader shader ("res/shader/basic.shader" ) ; shader.Bind (); shader.SetUniform4f ("u_Color" , 0.8f , 0.3f , 0.8f , 1.0f ); const Texture texture ("res/textures/Checkerboard.png" ) texture.Bind (); shader.SetUniform1i ("u_Texture" , 0 ); va.Unbind (); shader.Unbind (); vb.Unbind (); ib.Unbind (); Renderer renderer; float r = 0.0f ; float increment = 0.05f ; while (!glfwWindowShouldClose (window)) { renderer.Clear (); shader.Bind (); shader.SetUniform4f ("u_Color" , r, 0.3f , 0.8f , 1.0f ); renderer.Draw (va, ib, shader); if (r > 1.0f ) increment = -0.05f ; else if (r < 0.0f ) increment = 0.05f ; r += increment; glfwSwapBuffers (window); glfwPollEvents (); } glfwTerminate (); return 0 ; }
需要注意这里调用了 Shader.h 的新增代码:
1 2 3 4 5 6 7 8 9 10 11 12 13 14 15 16 17 18 19 20 21 22 23 24 25 26 27 28 29 30 31 32 33 34 35 36 #pragma once #include <string> #include <unordered_map> struct ShaderProgramSource { std::string VertexSource; std::string FragmentSource; }; class Shader { private: std::string m_FilePath; unsigned int m_RendererID; std::unordered_map<std::string, int> m_UniformLocationCache; public: Shader(const std::string& filepath); ~Shader(); void Bind() const; void Unbind() const; // Set uniforms + void SetUniform1i(const std::string& name, int value); + void SetUniform1f(const std::string& name, float value); void SetUniform4f(const std::string& name, float v0, float v1, float v2, float v3); private: ShaderProgramSource ParseShader(const std::string& filepath) const; unsigned int CompileShader(unsigned int type, const std::string& source); unsigned int CreateShader(const std::string& vertexShader, const std::string& fragmentShader); int GetUniformLocation(const std::string& name); };
1 2 3 4 5 6 7 8 9 10 11 12 13 14 15 16 17 18 19 20 21 22 23 24 25 26 27 28 29 30 31 32 33 34 35 36 37 38 39 40 41 42 43 44 45 46 47 48 49 50 51 52 53 54 55 56 57 58 59 60 61 62 63 64 65 66 67 68 69 70 71 72 73 74 75 76 77 78 79 80 81 82 83 84 85 86 87 88 89 90 91 92 93 94 95 96 97 98 99 100 101 102 103 104 105 106 107 108 109 110 111 112 113 114 115 116 117 118 119 120 121 122 123 124 125 126 127 128 129 130 131 132 133 134 135 #include "Shader.h" #include <iostream> #include <fstream> #include <sstream> #include "Renderer.h" Shader::Shader(const std::string& filepath) : m_FilePath(filepath), m_RendererID(0) { const ShaderProgramSource source = ParseShader(filepath); m_RendererID = CreateShader(source.VertexSource, source.FragmentSource); } Shader::~Shader() { GLCall(glDeleteProgram(m_RendererID)) } void Shader::Bind() const { GLCall(glUseProgram(m_RendererID)) } void Shader::Unbind() const { GLCall(glUseProgram(0)) } +void Shader::SetUniform1i(const std::string& name, int value) +{ + GLCall(glUniform1i(GetUniformLocation(name), value)) +} +void Shader::SetUniform1f(const std::string& name, float value) +{ + GLCall(glUniform1f(GetUniformLocation(name), value)) +} void Shader::SetUniform4f(const std::string& name, float v0, float v1, float v2, float v3) { GLCall(glUniform4f(GetUniformLocation(name), v0, v1, v2, v3)) } int Shader::GetUniformLocation(const std::string& name) { if (m_UniformLocationCache.find(name) != m_UniformLocationCache.end()) return m_UniformLocationCache[name]; GLCall(const int location = glGetUniformLocation(m_RendererID, name.c_str())) if (location == -1) std::cout << "Warning: uniform '" << name << "' doesn't exist!" << std::endl; return location; } ShaderProgramSource Shader::ParseShader(const std::string& filepath) const { std::ifstream stream(filepath); enum class ShaderType { NONE = -1, VERTEX = 0, FRAGMENT = 1 }; std::string line; std::stringstream ss[2]; ShaderType type = ShaderType::NONE; while (getline(stream, line)) { if (line.find("#shader") != std::string::npos) { if (line.find("vertex") != std::string::npos) type = ShaderType::VERTEX; else if (line.find("fragment") != std::string::npos) type = ShaderType::FRAGMENT; } else { ss[static_cast<int>(type)] << line << '\n'; } } return { ss[0].str(), ss[1].str() }; } unsigned int Shader::CompileShader(unsigned int type, const std::string& source) { const unsigned int id = glCreateShader(type); const char* src = source.c_str(); GLCall(glShaderSource(id, 1, &src, nullptr)) GLCall(glCompileShader(id)) // TODO: Error handling int result; GLCall(glGetShaderiv(id, GL_COMPILE_STATUS, &result)) if (result == GL_FALSE) { int length; GLCall(glGetShaderiv(id, GL_INFO_LOG_LENGTH, &length)) char* message = static_cast<char*>(malloc(length * sizeof(char))); GLCall(glGetShaderInfoLog(id, length, &length, message)) std::cout << "Failed to compile " << (type == GL_VERTEX_SHADER ? "vertex" : "fragment") << "shader!" << std::endl; std::cout << message << std::endl; GLCall(glDeleteShader(id)) return 0; } return id; } unsigned int Shader::CreateShader(const std::string& vertexShader, const std::string& fragmentShader) { const unsigned int program = glCreateProgram(); const unsigned int vs = CompileShader(GL_VERTEX_SHADER, vertexShader); const unsigned int fs = CompileShader(GL_FRAGMENT_SHADER, fragmentShader); GLCall(glAttachShader(program, vs)) GLCall(glAttachShader(program, fs)) GLCall(glLinkProgram(program)) GLCall(glValidateProgram(program)) GLCall(glDeleteShader(vs)) GLCall(glDeleteShader(fs)) return program; }
着色器 basic.shader 代码如下:
1 2 3 4 5 6 7 8 9 10 11 12 13 14 15 16 17 18 19 20 21 22 23 24 25 26 27 28 29 30 #shader vertex #version 330 core layout (location = 0 ) in vec4 position;layout (location = 1 ) in vec2 texCoord;out vec2 v_TexCoord;void main(){ gl_Position = position; v_TexCoord = texCoord; } #shader fragment #version 330 core layout (location = 0 ) out vec4 color;in vec2 v_TexCoord;uniform vec4 u_Color;uniform sampler2D u_Texture;void main(){ vec4 texColor = texture (u_Texture, v_TexCoord); color = texColor; }
最终我们把纹理图片渲染到屏幕上的一个四边形上。
OpenGL中的混合
上一期其实我们在渲染纹理时遇到了一些问题,我们启用了一个叫混合的东西,设置了一个混合函数,这就随机得到了我们的纹理:
1 2 GLCall (glEnable (GL_BLEND))GLCall (glBlendFunc (GL_SRC_ALPHA, GL_ONE_MINUS_SRC_ALPHA))
混合 什么是混合?为什么我们的纹理渲染一开始就不正确?
混合很简单。本质上,当我们渲染一些部分或完全透明的东西时我们会想到 Ps 降低透明度,而图形编程必须告诉电脑你真正想让它做什么,因为它不知道你们想做什么。默认情况下 OpenGL 不执行任何混合,它只需要你们渲染的东西,然后把它渲染成不透明的东西。
之前我们渲染了红色方块,在它上面我们以某种形式渲染了一个半透明的蓝色方块(不透明的蓝色方块会直接覆盖红色方块),我们期望得到这两种颜色的组合:紫色。如果我们现实生活中拿红玻璃和蓝玻璃然后把它们像这样叠在一起,我们会看到穿过的光实际上是紫色的,那就是我们用眼睛所看到的。
所以混合只决定了我们如何将输出颜色与目标缓冲区中已经存在的颜色结合起来
我们的输出颜色为片段着色器中输出的颜色,也被称为 source
在这个例子中我们把它画到一个已经存在的缓冲区上,也就是我们的目标 destination:红色方块
混合控制 那么我们如何控制这两种颜色混合的方式呢? 我们在 OpenGL 在有三种不同的方法,他们做的事情非常不同:
首先,启用和禁用 glEnable(GL_BLEND)、glDisable(GL_BLEND),参数 GL_BLEND。默认情况下不会启用混合
glBlendFunc(src, dest) 指定如何将两种颜色混合在一起(丢掉 dest 并用 src 覆盖),其中 RGB 因子将乘以所有颜色通道,所以 src 默认为 1 而 dest 默认为 0glBlendEquation(mode) 混合不等式,参数 mode 为组合方式(默认为 GL_FUNC_ADD)
OpenGL中的数学
GLM库
在 Release 界面下载最新的 zip 文件:
下载完毕之后将 glm 复制粘贴到 src/vendor 中。
glm 是一个只包含头文件的库,这意味着没有 cpp 文件不需要编译它,所以我们不需要链接到库直接使用。右键项目属性,在 C/C++ 找到附加包含目录,添加 src/vendor。
投影矩阵 投影矩阵是我们告诉窗口的一种方式,告诉它我们想要如何将所有不同的顶点映射到它。所以我们有一个填充了顶点位置顶点缓冲区这样的概念,但是我们需要把它转换到 2D 平面,因为当我们把它绘制在笔记本电脑屏幕或电脑显示器上时需要以 2D 的方式绘制出来。
那么想象一个 3D 世界,我们有一个 3D 世界的数学表示,但我们需要把它绘制在 2D 表面上。数学上我们如何从 3D 几何图形到 2D 平面图形的?那就是投影矩阵的用处。
1 2 3 4 5 6 7 8 9 10 11 12 13 14 15 16 17 18 19 20 21 22 23 24 25 26 27 28 29 30 31 32 33 34 35 36 37 38 39 40 41 42 43 44 45 46 47 48 49 50 51 52 53 54 55 56 57 58 59 60 61 62 63 64 65 66 67 68 69 70 71 72 73 74 75 76 77 78 79 80 81 82 83 84 85 86 87 88 89 90 91 92 93 94 95 96 97 98 99 100 101 102 103 104 105 106 107 108 109 110 111 112 113 114 115 116 117 118 119 120 121 122 123 124 #include <iostream> #include <fstream> #include <GL/glew.h> #include <GLFW/glfw3.h> #include "Renderer.h" #include "VertexBuffer.h" #include "VertexBufferLayout.h" #include "IndexBuffer.h" #include "VertexArray.h" #include "Shader.h" #include "Texture.h" +#include "glm/glm.hpp" +#include "glm/gtc/matrix_transform.hpp" int main() { /* Initialize the library */ if (!glfwInit()) return -1; glfwWindowHint(GLFW_CONTEXT_VERSION_MAJOR, 3); glfwWindowHint(GLFW_CONTEXT_VERSION_MINOR, 3); glfwWindowHint(GLFW_OPENGL_PROFILE, GLFW_OPENGL_CORE_PROFILE); /* Create a Windowed mode and its OpenGL context */ GLFWwindow* window = glfwCreateWindow(640, 480, "Hello World", nullptr, nullptr); if (!window) { GLCall(glfwTerminate()) return -1; } /* Make the window's context current */ glfwMakeContextCurrent(window); glfwSwapInterval(1); if (glewInit() != GLEW_OK) std::cout << "Error!" << std::endl; std::cout << glGetString(GL_VERSION) << std::endl; constexpr float positions[] = { -0.5f, -0.5f, 0.0f, 0.0f, // 0 0.5f, -0.5f, 1.0f, 0.0f, // 1 0.5f, 0.5f, 1.0f, 1.0f, // 2 -0.5f, 0.5f, 0.0f, 1.0f // 3 }; const unsigned int indices[] = { 0, 1, 2, 2, 3, 0 }; GLCall(glEnable(GL_BLEND)) GLCall(glBlendFunc(GL_SRC_ALPHA, GL_ONE_MINUS_SRC_ALPHA)) unsigned int vao; GLCall(glGenVertexArrays(1, &vao)) GLCall(glBindVertexArray(vao)) VertexArray va; const VertexBuffer vb(positions, static_cast<unsigned long long>(4) * 4 * sizeof(float)); VertexBufferLayout layout; layout.Push<float>(2); layout.Push<float>(2); va.AddBuffer(vb, layout); const IndexBuffer ib(indices, 6); glm::mat4 proj = glm::ortho(-2.0f, 2.0f, -1.5f, 1.5f, -1.0f, 1.0f); Shader shader("res/shader/basic.shader"); shader.Bind(); - shader.SetUniform4f("u_Color", 0.8f, 0.3f, 0.8f, 1.0f); const Texture texture("res/textures/Checkerboard.png"); texture.Bind(); shader.SetUniform1i("u_Texture", 0); va.Unbind(); shader.Unbind(); vb.Unbind(); ib.Unbind(); Renderer renderer; float r = 0.0f; float increment = 0.05f; /* Loop until the user closes the window */ while (!glfwWindowShouldClose(window)) { /* Render here */ renderer.Clear(); shader.Bind(); - shader.SetUniform4f("u_Color", r, 0.3f, 0.8f, 1.0f); renderer.Draw(va, ib, shader); if (r > 1.0f) increment = -0.05f; else if (r < 0.0f) increment = 0.05f; r += increment; /* Swap front and back buffers */ glfwSwapBuffers(window); /* Poll for and events */ glfwPollEvents(); } glfwTerminate(); return 0; }
一个正交矩阵本质上就是把所有的坐标映射到 2D 屏幕上的一种方法,离得更远的物体并不会变小。这和我们习惯的透视投影是相反的。
1 2 3 4 5 6 7 8 9 10 11 12 13 14 15 16 17 18 19 20 21 22 23 24 25 26 27 28 29 30 31 32 #shader vertex #version 330 core layout(location = 0) in vec4 position; layout(location = 1) in vec2 texCoord; out vec2 v_TexCoord; +uniform mat4 u_MVP; void main() { gl_Position = position; v_TexCoord = texCoord; } #shader fragment #version 330 core layout(location = 0) out vec4 color; in vec2 v_TexCoord; uniform vec4 u_Color; uniform sampler2D u_Texture; void main() { vec4 texColor = texture(u_Texture, v_TexCoord); color = texColor; }
MVP 是我们的模型 (Model) 视图 (View) 投影 (Projection) 矩阵,后面会讲到这些(请复习 GAMES101)。
接着在顶点着色器用这个矩阵乘以我的顶点位置,每个顶点运行一次基于我们提供的正交矩阵将它移到合适的空间。
1 2 3 4 5 void main(){ gl_Position = u_MVP * position; v_TexCoord = texCoord; }
为了设置 u_MVP,我们需要在 Shader.h 中补充 SetUniformMat4f() 方法:
1 2 3 4 5 6 7 8 9 10 11 12 13 14 15 16 17 18 19 20 21 22 23 24 25 26 27 28 29 30 31 32 33 34 35 36 37 38 39 #pragma once #include <string> #include <unordered_map> +#include "glm/glm.hpp" struct ShaderProgramSource { std::string VertexSource; std::string FragmentSource; }; class Shader { private: std::string m_FilePath; unsigned int m_RendererID; std::unordered_map<std::string, int> m_UniformLocationCache; public: Shader(const std::string& filepath); ~Shader(); void Bind() const; void Unbind() const; // Set uniforms void SetUniform1i(const std::string& name, int value); void SetUniform1f(const std::string& name, float value); void SetUniform4f(const std::string& name, float v0, float v1, float v2, float v3); + void SetUniformMat4f(const std::string& name, const glm::mat4& matrix); private: ShaderProgramSource ParseShader(const std::string& filepath) const; unsigned int CompileShader(unsigned int type, const std::string& source); unsigned int CreateShader(const std::string& vertexShader, const std::string& fragmentShader); int GetUniformLocation(const std::string& name); };
Shader.cpp 中实现方法:
1 2 3 4 void Shader::SetUniformMat4f (const std::string& name, const glm::mat4& matrix) GLCall (glUniformMatrix4fv (GetUniformLocation (name), 1 , GL_FALSE, &matrix[0 ][0 ])) }
最后返回 Application.cpp:
1 2 3 4 5 6 7 8 9 10 11 12 13 14 15 16 17 18 19 20 21 22 23 24 25 26 27 28 29 30 31 32 33 34 35 36 37 38 39 40 41 42 43 44 45 46 47 48 49 50 51 52 53 54 55 56 57 58 59 60 61 62 63 64 65 66 67 68 69 70 71 72 73 74 75 76 77 78 79 80 81 82 83 84 85 86 87 88 89 90 91 92 93 94 95 96 97 98 99 100 101 102 103 104 105 106 107 108 109 110 111 112 113 114 115 116 117 118 119 120 121 122 123 124 125 #include <iostream> #include <fstream> #include <GL/glew.h> #include <GLFW/glfw3.h> #include "Renderer.h" #include "VertexBuffer.h" #include "VertexBufferLayout.h" #include "IndexBuffer.h" #include "VertexArray.h" #include "Shader.h" #include "Texture.h" +#include "glm/glm.hpp" +#include "glm/gtc/matrix_transform.hpp" int main() { /* Initialize the library */ if (!glfwInit()) return -1; glfwWindowHint(GLFW_CONTEXT_VERSION_MAJOR, 3); glfwWindowHint(GLFW_CONTEXT_VERSION_MINOR, 3); glfwWindowHint(GLFW_OPENGL_PROFILE, GLFW_OPENGL_CORE_PROFILE); /* Create a Windowed mode and its OpenGL context */ GLFWwindow* window = glfwCreateWindow(640, 480, "Hello World", nullptr, nullptr); if (!window) { GLCall(glfwTerminate()) return -1; } /* Make the window's context current */ glfwMakeContextCurrent(window); glfwSwapInterval(1); if (glewInit() != GLEW_OK) std::cout << "Error!" << std::endl; std::cout << glGetString(GL_VERSION) << std::endl; constexpr float positions[] = { -0.5f, -0.5f, 0.0f, 0.0f, // 0 0.5f, -0.5f, 1.0f, 0.0f, // 1 0.5f, 0.5f, 1.0f, 1.0f, // 2 -0.5f, 0.5f, 0.0f, 1.0f // 3 }; const unsigned int indices[] = { 0, 1, 2, 2, 3, 0 }; GLCall(glEnable(GL_BLEND)) GLCall(glBlendFunc(GL_SRC_ALPHA, GL_ONE_MINUS_SRC_ALPHA)) unsigned int vao; GLCall(glGenVertexArrays(1, &vao)) GLCall(glBindVertexArray(vao)) VertexArray va; const VertexBuffer vb(positions, static_cast<unsigned long long>(4) * 4 * sizeof(float)); VertexBufferLayout layout; layout.Push<float>(2); layout.Push<float>(2); va.AddBuffer(vb, layout); const IndexBuffer ib(indices, 6); + const glm::mat4 proj = glm::ortho(-2.0f, 2.0f, -1.5f, 1.5f, -1.0f, 1.0f); Shader shader("res/shader/basic.shader"); shader.Bind(); // shader.SetUniform4f("u_Color", 0.8f, 0.3f, 0.8f, 1.0f); + shader.SetUniformMat4f("u_MVP", proj); const Texture texture("res/textures/Checkerboard.png"); texture.Bind(); shader.SetUniform1i("u_Texture", 0); va.Unbind(); shader.Unbind(); vb.Unbind(); ib.Unbind(); Renderer renderer; float r = 0.0f; float increment = 0.05f; /* Loop until the user closes the window */ while (!glfwWindowShouldClose(window)) { /* Render here */ renderer.Clear(); shader.Bind(); // shader.SetUniform4f("u_Color", r, 0.3f, 0.8f, 1.0f); renderer.Draw(va, ib, shader); if (r > 1.0f) increment = -0.05f; else if (r < 0.0f) increment = 0.05f; r += increment; /* Swap front and back buffers */ glfwSwapBuffers(window); /* Poll for and events */ glfwPollEvents(); } glfwTerminate(); return 0; }
最终我们得到了横纵比 4:3 的纹理图形。
OpenGL中的投影矩阵
投影矩阵本质上是一种数学,将空间中所有 3D 点转换成 2D 窗口中的东西,这就是投影矩阵。
投影矩阵的实际变换就是把所有那些位置转换成所谓的标准坐标,也就是某种标准化空间,然后映射到我们的窗口。标准空间意味着在每个 xyz 轴上都有一个 -1 和 1 之间的坐标系统,所以我想说的是一个窗口的图像分辨率在点上无关紧要。
我们有正交投影和透视投影。
正交投影通常用于 2D 渲染,当然也可用于 3D 对关卡编辑器或 3D 建模程序等有用。透视投影通常用于 3D,尤其是拥有深度概念 z 的时候。(后面就是更改矩阵实践体验,没有什么东西了)
1 2 3 4 5 6 7 8 9 10 11 12 13 14 15 16 17 18 19 20 21 22 23 24 25 26 27 28 29 30 31 32 33 34 35 36 37 38 39 40 41 42 43 44 45 46 47 48 49 50 51 52 53 54 55 56 57 58 59 60 61 62 63 64 65 66 67 68 69 70 71 72 73 74 75 76 77 78 79 80 81 82 83 84 85 86 87 88 89 90 91 92 93 94 95 96 97 98 99 100 101 102 103 104 105 106 107 108 109 110 111 112 113 114 115 116 117 118 119 120 121 122 123 124 125 126 127 #include <iostream> #include <fstream> #include <GL/glew.h> #include <GLFW/glfw3.h> #include "Renderer.h" #include "VertexBuffer.h" #include "VertexBufferLayout.h" #include "IndexBuffer.h" #include "VertexArray.h" #include "Shader.h" #include "Texture.h" #include "glm/glm.hpp" #include "glm/gtc/matrix_transform.hpp" int main() { /* Initialize the library */ if (!glfwInit()) return -1; glfwWindowHint(GLFW_CONTEXT_VERSION_MAJOR, 3); glfwWindowHint(GLFW_CONTEXT_VERSION_MINOR, 3); glfwWindowHint(GLFW_OPENGL_PROFILE, GLFW_OPENGL_CORE_PROFILE); /* Create a Windowed mode and its OpenGL context */ GLFWwindow* window = glfwCreateWindow(640, 480, "Hello World", nullptr, nullptr); if (!window) { GLCall(glfwTerminate()) return -1; } /* Make the window's context current */ glfwMakeContextCurrent(window); glfwSwapInterval(1); if (glewInit() != GLEW_OK) std::cout << "Error!" << std::endl; std::cout << glGetString(GL_VERSION) << std::endl; + constexpr float positions[] = { + 100.0f, 100.0f, 0.0f, 0.0f, // 0 + 200.0f, 100.0f, 1.0f, 0.0f, // 1 + 200.0f, 200.0f, 1.0f, 1.0f, // 2 + 100.0f, 200.0f, 0.0f, 1.0f // 3 + }; const unsigned int indices[] = { 0, 1, 2, 2, 3, 0 }; GLCall(glEnable(GL_BLEND)) GLCall(glBlendFunc(GL_SRC_ALPHA, GL_ONE_MINUS_SRC_ALPHA)) unsigned int vao; GLCall(glGenVertexArrays(1, &vao)) GLCall(glBindVertexArray(vao)) VertexArray va; const VertexBuffer vb(positions, static_cast<unsigned long long>(4) * 4 * sizeof(float)); VertexBufferLayout layout; layout.Push<float>(2); layout.Push<float>(2); va.AddBuffer(vb, layout); const IndexBuffer ib(indices, 6); + const glm::mat4 proj = glm::ortho(0.0f, 960.0f, 0.0f, 540.0f, -1.0f, 1.0f); + glm::vec4 vp(100.0f, 100.0f, 0.0f, 1.0f); + glm::vec4 result = proj * vp; Shader shader("res/shader/basic.shader"); shader.Bind(); // shader.SetUniform4f("u_Color", 0.8f, 0.3f, 0.8f, 1.0f); shader.SetUniformMat4f("u_MVP", proj); const Texture texture("res/textures/Checkerboard.png"); texture.Bind(); shader.SetUniform1i("u_Texture", 0); va.Unbind(); shader.Unbind(); vb.Unbind(); ib.Unbind(); float r = 0.0f; float increment = 0.05f; /* Loop until the user closes the window */ while (!glfwWindowShouldClose(window)) { /* Render here */ Renderer renderer; renderer.Clear(); shader.Bind(); // shader.SetUniform4f("u_Color", r, 0.3f, 0.8f, 1.0f); renderer.Draw(va, ib, shader); if (r > 1.0f) increment = -0.05f; else if (r < 0.0f) increment = 0.05f; r += increment; /* Swap front and back buffers */ glfwSwapBuffers(window); /* Poll for and events */ glfwPollEvents(); } glfwTerminate(); return 0; }
OpenGL中的模型视图投影矩阵
在我们的着色器代码中或者在 C++ 的 glm 代码中,它可以是 pvm:投影 x 视图 x 模型。而像 Direct3D 和 DirectX 因为它们确实处理的矩阵是行主序的,那么就是 mvp:模型 x 视图 x 投影。
视图矩阵 OpenGL 中没有相机这个东西,我们能做的就是移动几何体和顶点。所以为了模拟相机向左移动,我们需要做的是将所有东西向右移动,可以算一种逆向运算。
1 2 3 4 5 6 7 8 9 10 11 12 13 14 15 16 17 18 19 20 21 22 23 24 25 26 27 28 29 30 31 32 33 34 35 36 37 38 39 40 41 42 43 44 45 46 47 48 49 50 51 52 53 54 55 56 57 58 59 60 61 62 63 64 65 66 67 68 69 70 71 72 73 74 75 76 77 78 79 80 81 82 83 84 85 86 87 88 89 90 91 92 93 94 95 96 97 98 99 100 101 102 103 104 105 106 107 108 109 110 111 112 113 114 115 116 117 118 119 120 121 122 123 124 125 126 127 128 129 #include <iostream> #include <fstream> #include <GL/glew.h> #include <GLFW/glfw3.h> #include "Renderer.h" #include "VertexBuffer.h" #include "VertexBufferLayout.h" #include "IndexBuffer.h" #include "VertexArray.h" #include "Shader.h" #include "Texture.h" #include "glm/glm.hpp" #include "glm/gtc/matrix_transform.hpp" int main() { /* Initialize the library */ if (!glfwInit()) return -1; glfwWindowHint(GLFW_CONTEXT_VERSION_MAJOR, 3); glfwWindowHint(GLFW_CONTEXT_VERSION_MINOR, 3); glfwWindowHint(GLFW_OPENGL_PROFILE, GLFW_OPENGL_CORE_PROFILE); /* Create a Windowed mode and its OpenGL context */ GLFWwindow* window = glfwCreateWindow(640, 480, "Hello World", nullptr, nullptr); if (!window) { GLCall(glfwTerminate()) return -1; } /* Make the window's context current */ glfwMakeContextCurrent(window); glfwSwapInterval(1); if (glewInit() != GLEW_OK) std::cout << "Error!" << std::endl; std::cout << glGetString(GL_VERSION) << std::endl; constexpr float positions[] = { 100.0f, 100.0f, 0.0f, 0.0f, // 0 200.0f, 100.0f, 1.0f, 0.0f, // 1 200.0f, 200.0f, 1.0f, 1.0f, // 2 100.0f, 200.0f, 0.0f, 1.0f // 3 }; const unsigned int indices[] = { 0, 1, 2, 2, 3, 0 }; GLCall(glEnable(GL_BLEND)) GLCall(glBlendFunc(GL_SRC_ALPHA, GL_ONE_MINUS_SRC_ALPHA)) unsigned int vao; GLCall(glGenVertexArrays(1, &vao)) GLCall(glBindVertexArray(vao)) VertexArray va; const VertexBuffer vb(positions, static_cast<unsigned long long>(4) * 4 * sizeof(float)); VertexBufferLayout layout; layout.Push<float>(2); layout.Push<float>(2); va.AddBuffer(vb, layout); const IndexBuffer ib(indices, 6); const glm::mat4 proj = glm::ortho(0.0f, 960.0f, 0.0f, 540.0f, -1.0f, 1.0f); + const glm::mat4 view = glm::translate(glm::mat4(1.0f), glm::vec3(-100, 0, 0)); + glm::mat4 mvp = proj * view; - glm::vec4 result = proj * vp; Shader shader("res/shader/basic.shader"); shader.Bind(); // shader.SetUniform4f("u_Color", 0.8f, 0.3f, 0.8f, 1.0f); + shader.SetUniformMat4f("u_MVP", mvp); const Texture texture("res/textures/Checkerboard.png"); texture.Bind(); shader.SetUniform1i("u_Texture", 0); va.Unbind(); shader.Unbind(); vb.Unbind(); ib.Unbind(); float r = 0.0f; float increment = 0.05f; /* Loop until the user closes the window */ while (!glfwWindowShouldClose(window)) { /* Render here */ Renderer renderer; renderer.Clear(); shader.Bind(); // shader.SetUniform4f("u_Color", r, 0.3f, 0.8f, 1.0f); renderer.Draw(va, ib, shader); if (r > 1.0f) increment = -0.05f; else if (r < 0.0f) increment = 0.05f; r += increment; /* Swap front and back buffers */ glfwSwapBuffers(window); /* Poll for and events */ glfwPollEvents(); } glfwTerminate(); return 0; }
数学上将相机向左移动就是将所有矩阵向右移动,如果使用相机类应该将这些接口封装好等待调用即可。
模型矩阵 1 2 3 4 5 const glm::mat4 proj = glm::ortho(0.0f, 960.0f, 0.0f, 540.0f, -1.0f, 1.0f); const glm::mat4 view = glm::translate(glm::mat4(1.0f), glm::vec3(-100, 0, 0)); + const glm::mat4 model = glm::translate(glm::mat4(1.0f), glm::vec3(200, 200, 0)); + const glm::mat4 mvp = proj * view * model;
OpenGL中的ImGui
今天我们会整合一些 ImGui 的东西,它本质上是一个我们可以在 OpenGL、DirectX 以及任何渲染接口中使用的 GUI 图形用户接口库。 它的大多数接口是独立的,这是我们在屏幕上绘制 UI 界面的一种方式。
ImGui
在 Release 界面下载 zip 源码,我们关心的是 OpenGL 的例子 imgui-1.88/examples/example_glfw_opengl3 和根目录下的头文件。所以拷贝两者到 src/vendor/imgui 下。
注意,最新版本的 ImGui 中的 impl 两个实现文件已转移到主目录的 backends 下面。实在搞不懂可以参考该分支 ChernoOpenGL 的配置。
1 2 3 4 5 6 7 8 9 10 11 12 13 14 15 16 17 18 19 20 21 22 23 24 25 26 27 28 29 30 31 32 33 34 35 36 37 38 39 40 41 42 43 44 45 46 47 48 49 50 51 52 53 54 55 56 57 58 59 60 61 62 63 64 65 66 67 68 69 70 71 72 73 74 75 76 77 78 79 80 81 82 83 84 85 86 87 88 89 90 91 92 93 94 95 96 97 98 99 100 101 102 103 104 105 106 107 108 109 110 111 112 113 114 115 116 117 118 119 120 121 122 123 124 125 126 127 128 129 130 131 132 133 134 135 136 137 138 139 140 141 142 143 144 145 146 147 148 149 150 151 152 153 154 155 156 157 158 159 160 161 162 163 164 165 166 167 168 #include <iostream> #include <fstream> #include <GL/glew.h> #include <GLFW/glfw3.h> #include "Renderer.h" #include "VertexBuffer.h" #include "VertexBufferLayout.h" #include "IndexBuffer.h" #include "VertexArray.h" #include "Shader.h" #include "Texture.h" #include "glm/glm.hpp" #include "glm/gtc/matrix_transform.hpp" +#include "imgui/imgui.h" +#include "imgui/imgui_impl_glfw.h" +#include "imgui/imgui_impl_opengl3.h" int main() { /* Initialize the library */ if (!glfwInit()) return -1; glfwWindowHint(GLFW_CONTEXT_VERSION_MAJOR, 3); glfwWindowHint(GLFW_CONTEXT_VERSION_MINOR, 3); glfwWindowHint(GLFW_OPENGL_PROFILE, GLFW_OPENGL_CORE_PROFILE); /* Create a Windowed mode and its OpenGL context */ GLFWwindow* window = glfwCreateWindow(640, 480, "Hello World", nullptr, nullptr); if (!window) { GLCall(glfwTerminate()) return -1; } /* Make the window's context current */ glfwMakeContextCurrent(window); glfwSwapInterval(1); if (glewInit() != GLEW_OK) std::cout << "Error!" << std::endl; std::cout << glGetString(GL_VERSION) << std::endl; constexpr float positions[] = { 100.0f, 100.0f, 0.0f, 0.0f, // 0 200.0f, 100.0f, 1.0f, 0.0f, // 1 200.0f, 200.0f, 1.0f, 1.0f, // 2 100.0f, 200.0f, 0.0f, 1.0f // 3 }; const unsigned int indices[] = { 0, 1, 2, 2, 3, 0 }; GLCall(glEnable(GL_BLEND)) GLCall(glBlendFunc(GL_SRC_ALPHA, GL_ONE_MINUS_SRC_ALPHA)) unsigned int vao; GLCall(glGenVertexArrays(1, &vao)) GLCall(glBindVertexArray(vao)) VertexArray va; const VertexBuffer vb(positions, static_cast<unsigned long long>(4) * 4 * sizeof(float)); VertexBufferLayout layout; layout.Push<float>(2); layout.Push<float>(2); va.AddBuffer(vb, layout); const IndexBuffer ib(indices, 6); const glm::mat4 proj = glm::ortho(0.0f, 960.0f, 0.0f, 720.0f, -1.0f, 1.0f); const glm::mat4 view = glm::translate(glm::mat4(1.0f), glm::vec3(-100, 0, 0)); const glm::mat4 model = glm::translate(glm::mat4(1.0f), glm::vec3(200, 200, 0)); glm::mat4 mvp = proj * view * model; Shader shader("res/shader/basic.shader"); shader.Bind(); shader.SetUniformMat4f("u_MVP", mvp); const Texture texture("res/textures/Checkerboard.png"); texture.Bind(); shader.SetUniform1i("u_Texture", 0); va.Unbind(); shader.Unbind(); vb.Unbind(); ib.Unbind(); + ImGui::CreateContext(); + ImGui_ImplGlfw_InitForOpenGL(window, true); + ImGui::StyleColorsDark(); + const char* glsl_version = "#version 330"; + ImGui_ImplOpenGL3_Init(glsl_version); float r = 0.0f; float increment = 0.05f; + glm::vec3 translation(200, 200, 0); /* Loop until the user closes the window */ while (!glfwWindowShouldClose(window)) { /* Render here */ Renderer renderer; renderer.Clear(); + ImGui_ImplOpenGL3_NewFrame(); + ImGui_ImplGlfw_NewFrame(); + ImGui::NewFrame(); + glm::mat4 model = glm::translate(glm::mat4(1.0f), translation); + glm::mat4 mvp = proj * view * model; shader.Bind(); // shader.SetUniform4f("u_Color", r, 0.3f, 0.8f, 1.0f); + shader.SetUniformMat4f("u_MVP", mvp); renderer.Draw(va, ib, shader); vb.Bind(); ib.Bind(); if (r > 1.0f) increment = -0.05f; else if (r < 0.0f) increment = 0.05f; r += increment; + { + ImGui::Begin("ImGui"); + ImGui::SliderFloat3("Translation", &translation.x, 0.0f, 960.0f); + ImGui::Text("Application average %.3f ms/frame (%.1f FPS)", 1000.0f / ImGui::GetIO().Framerate, ImGui::GetIO().Framerate); + ImGui::End(); + } + ImGui::Render(); + ImGui_ImplOpenGL3_RenderDrawData(ImGui::GetDrawData()); /* Swap front and back buffers */ glfwSwapBuffers(window); /* Poll for and events */ glfwPollEvents(); } + ImGui_ImplOpenGL3_Shutdown(); + ImGui_ImplGlfw_Shutdown(); + ImGui::DestroyContext(); glfwDestroyWindow(window); glfwTerminate(); return 0; }
批量渲染对象
今天我们要讲的是如何在屏幕上渲染多个目标。
1 2 3 4 5 6 7 8 9 10 11 12 13 14 15 16 17 18 19 20 21 22 23 24 25 26 27 28 29 30 31 32 33 34 35 36 37 38 39 40 41 42 43 44 45 46 47 48 49 50 51 52 53 54 55 56 57 58 59 60 61 62 63 64 65 66 67 68 69 70 71 72 73 74 75 76 77 78 79 80 81 82 83 84 85 86 87 88 89 90 91 92 93 94 95 96 97 98 99 100 101 102 103 104 105 106 107 108 109 110 111 112 113 114 115 116 117 118 119 120 121 122 123 124 125 126 127 128 129 130 131 132 133 134 135 136 137 138 139 140 141 142 143 144 145 146 147 148 149 150 151 152 153 154 155 156 157 158 159 160 161 162 163 164 165 166 167 168 169 170 171 172 173 #include <iostream> #include <fstream> #include <GL/glew.h> #include <GLFW/glfw3.h> #include "Renderer.h" #include "VertexBuffer.h" #include "VertexBufferLayout.h" #include "IndexBuffer.h" #include "VertexArray.h" #include "Shader.h" #include "Texture.h" #include "glm/glm.hpp" #include "glm/gtc/matrix_transform.hpp" #include "imgui/imgui.h" #include "imgui/imgui_impl_glfw.h" #include "imgui/imgui_impl_opengl3.h" int main() { /* Initialize the library */ if (!glfwInit()) return -1; glfwWindowHint(GLFW_CONTEXT_VERSION_MAJOR, 3); glfwWindowHint(GLFW_CONTEXT_VERSION_MINOR, 3); glfwWindowHint(GLFW_OPENGL_PROFILE, GLFW_OPENGL_CORE_PROFILE); /* Create a Windowed mode and its OpenGL context */ GLFWwindow* window = glfwCreateWindow(640, 480, "Hello World", nullptr, nullptr); if (!window) { GLCall(glfwTerminate()) return -1; } /* Make the window's context current */ glfwMakeContextCurrent(window); glfwSwapInterval(1); if (glewInit() != GLEW_OK) std::cout << "Error!" << std::endl; std::cout << glGetString(GL_VERSION) << std::endl; constexpr float positions[] = { + -50.0f, -50.0f, 0.0f, 0.0f, // 0 + 50.0f, -50.0f, 1.0f, 0.0f, // 1 + 50.0f, 50.0f, 1.0f, 1.0f, // 2 + -50.0f, 50.0f, 0.0f, 1.0f // 3 }; const unsigned int indices[] = { 0, 1, 2, 2, 3, 0 }; GLCall(glEnable(GL_BLEND)) GLCall(glBlendFunc(GL_SRC_ALPHA, GL_ONE_MINUS_SRC_ALPHA)) unsigned int vao; GLCall(glGenVertexArrays(1, &vao)) GLCall(glBindVertexArray(vao)) VertexArray va; const VertexBuffer vb(positions, static_cast<unsigned long long>(4) * 4 * sizeof(float)); VertexBufferLayout layout; layout.Push<float>(2); layout.Push<float>(2); va.AddBuffer(vb, layout); const IndexBuffer ib(indices, 6); const glm::mat4 proj = glm::ortho(0.0f, 960.0f, 0.0f, 720.0f, -1.0f, 1.0f); + const glm::mat4 view = glm::translate(glm::mat4(1.0f), glm::vec3(0, 0, 0)); Shader shader("res/shader/basic.shader"); shader.Bind(); const Texture texture("res/textures/Checkerboard.png"); texture.Bind(); shader.SetUniform1i("u_Texture", 0); va.Unbind(); shader.Unbind(); vb.Unbind(); ib.Unbind(); ImGui::CreateContext(); ImGui_ImplGlfw_InitForOpenGL(window, true); ImGui::StyleColorsDark(); const char* glsl_version = "#version 330"; ImGui_ImplOpenGL3_Init(glsl_version); float r = 0.0f; float increment = 0.05f; + glm::vec3 translationA(200, 200, 0); + glm::vec3 translationB(400, 400, 0); /* Loop until the user closes the window */ while (!glfwWindowShouldClose(window)) { /* Render here */ Renderer renderer; renderer.Clear(); ImGui_ImplOpenGL3_NewFrame(); ImGui_ImplGlfw_NewFrame(); ImGui::NewFrame(); + { + glm::mat4 model = glm::translate(glm::mat4(1.0f), translationA); + glm::mat4 mvp = proj * view * model; + shader.Bind(); + shader.SetUniformMat4f("u_MVP", mvp); + + renderer.Draw(va, ib, shader); + } + { + glm::mat4 model = glm::translate(glm::mat4(1.0f), translationB); + glm::mat4 mvp = proj * view * model; + shader.Bind(); + shader.SetUniformMat4f("u_MVP", mvp); + + renderer.Draw(va, ib, shader); + } if (r > 1.0f) increment = -0.05f; else if (r < 0.0f) increment = 0.05f; r += increment; { ImGui::Begin("ImGui"); + ImGui::SliderFloat3("Translation A", &translationA.x, 0.0f, 960.0f); + ImGui::SliderFloat3("Translation B", &translationB.x, 0.0f, 960.0f); ImGui::Text("Application average %.3f ms/frame (%.1f FPS)", static_cast<double>(1000.0f / ImGui::GetIO().Framerate), static_cast<double>(ImGui::GetIO().Framerate)); ImGui::End(); } ImGui::Render(); ImGui_ImplOpenGL3_RenderDrawData(ImGui::GetDrawData()); /* Swap front and back buffers */ glfwSwapBuffers(window); /* Poll for and events */ glfwPollEvents(); } ImGui_ImplOpenGL3_Shutdown(); ImGui_ImplGlfw_Shutdown(); ImGui::DestroyContext(); glfwDestroyWindow(window); glfwTerminate(); return 0; }
实际上有两种不同的策略,但这里我们不必浪费内存,选择通过采用不同的模型矩阵实现批量渲染对象。
为OpenGL建立一个测试框架
现在我们的应用程序只是为 OpenGL 创建了一堆接口类,比如顶点缓冲区、顶点数组、索引缓冲区、纹理之类的东西,然后我们就有了这个 Application.cpp 文件也就是一些对 OpenGL 的调用。但我真正想做的是让我们有能力进行不同的测试,也就是说不同的应用领域不同的场景我们可以在每一个测试或者场景中循环,并且它的实现非常简单,我们只是在 ImGui 添加一个菜单显示所有可用的场景或测试或示例。
测试基类 在 src/ 下创建 tests 文件夹,新建 Test.h:
1 2 3 4 5 6 7 8 9 10 11 12 13 14 15 #pragma once namespace test{ class Test { public : Test () = default ; virtual ~Test () = default ; virtual void OnUpdate (float deltaTime) virtual void OnRender () virtual void OnImGuiRender () }; }
通过该测试基类我们可以自由分配堆栈资源而不必手动释放,因为其生命周期与该类同步,创建和销毁直接调用构造函数和析构函数。
颜色测试 新建 TestClearColor.h 和 TestClearColor.cpp。
1 2 3 4 5 6 7 8 9 10 11 12 13 14 15 16 17 18 19 20 21 #pragma once #include "Test.h" namespace test{ class TestClearColor : public Test { public : TestClearColor (); ~TestClearColor (); void OnUpdate (float deltaTime) override void OnRender () override void OnImGuiRender () override private : float m_ClearColor[4 ]; const char * m_Label; }; }
头文件 TestClearColor.h 的变量 m_ClearColor[4] 就是颜色的 RGBA,m_Label 为 UI 的标题字符串。
1 2 3 4 5 6 7 8 9 10 11 12 13 14 15 16 17 18 19 20 21 22 23 24 25 26 27 28 29 30 31 32 33 34 #include "TestClearColor.h" #include "Renderer.h" #include "imgui/imgui.h" namespace test{ TestClearColor::TestClearColor () : m_ClearColor{ 0.2f , 0.3f , 0.8f , 1.0f }, m_Label ("ClearColor" ) { } TestClearColor::~TestClearColor () { } void TestClearColor::OnUpdate (float deltaTime) { } void TestClearColor::OnRender () { GLCall (glClearColor (m_ClearColor[0 ], m_ClearColor[1 ], m_ClearColor[2 ], m_ClearColor[3 ])) GLCall (glClear (GL_COLOR_BUFFER_BIT)) } void TestClearColor::OnImGuiRender () { ImGui::ColorEdit4 (m_Label, m_ClearColor); } }
应用类 重新整理应用类 Application.cpp:
1 2 3 4 5 6 7 8 9 10 11 12 13 14 15 16 17 18 19 20 21 22 23 24 25 26 27 28 29 30 31 32 33 34 35 36 37 38 39 40 41 42 43 44 45 46 47 48 49 50 51 52 53 54 55 56 57 58 59 60 61 62 63 64 65 66 67 68 69 70 71 72 73 74 75 76 77 78 79 80 81 82 83 84 85 86 87 88 89 90 91 92 93 94 95 96 97 98 99 100 101 #include <iostream> #include <fstream> #include <GL/glew.h> #include <GLFW/glfw3.h> #include "Renderer.h" #include "Shader.h" #include "glm/glm.hpp" #include "imgui/imgui.h" #include "imgui/imgui_impl_glfw.h" #include "imgui/imgui_impl_opengl3.h" #include "tests/TestClearColor.h" int main () if (!glfwInit ()) return -1 ; glfwWindowHint (GLFW_CONTEXT_VERSION_MAJOR, 3 ); glfwWindowHint (GLFW_CONTEXT_VERSION_MINOR, 3 ); glfwWindowHint (GLFW_OPENGL_PROFILE, GLFW_OPENGL_CORE_PROFILE); GLFWwindow* window = glfwCreateWindow (640 , 480 , "Hello World" , nullptr , nullptr ); if (!window) { GLCall (glfwTerminate ()) return -1 ; } glfwMakeContextCurrent (window); glfwSwapInterval (1 ); if (glewInit () != GLEW_OK) std::cout << "Error!" << std::endl; std::cout << glGetString (GL_VERSION) << std::endl; GLCall (glEnable (GL_BLEND)) GLCall (glBlendFunc (GL_SRC_ALPHA, GL_ONE_MINUS_SRC_ALPHA)) ImGui::CreateContext (); ImGui_ImplGlfw_InitForOpenGL (window, true ); ImGui::StyleColorsDark (); const char * glsl_version = "#version 330" ; ImGui_ImplOpenGL3_Init (glsl_version); test::TestClearColor test; while (!glfwWindowShouldClose (window)) { Renderer renderer; renderer.Clear (); test.OnUpdate (0.0f ); test.OnRender (); ImGui_ImplOpenGL3_NewFrame (); ImGui_ImplGlfw_NewFrame (); ImGui::NewFrame (); { test.OnImGuiRender (); } ImGui::Render (); ImGui_ImplOpenGL3_RenderDrawData (ImGui::GetDrawData ()); glfwSwapBuffers (window); glfwPollEvents (); } ImGui_ImplOpenGL3_Shutdown (); ImGui_ImplGlfw_Shutdown (); ImGui::DestroyContext (); glfwDestroyWindow (window); glfwTerminate (); return 0 ; }
创建测试
测试菜单 在 Test.h 中新加入 TestMenu 测试菜单类:
1 2 3 4 5 6 7 8 9 10 11 12 13 14 15 16 17 18 19 20 21 22 23 24 25 26 27 28 29 30 31 32 33 34 35 36 37 38 #pragma once +#include <iostream> +#include <string> +#include <vector> +#include <functional> namespace test { class Test { public: Test() = default; virtual ~Test() = default; virtual void OnUpdate(float deltaTime) {} virtual void OnRender() {} virtual void OnImGuiRender() {} }; + class TestMenu : public Test + { + public: + TestMenu(Test*& currentTestPointer); + + void OnImGuiRender() override; + + template<typename T> + void RegisterTest(const std::string& name) + { + std::cout << "Registering test " << name << std::endl; + m_Tests.push_back(std::make_pair(name, [](){ return new T(); })); + } + + private: + Test*& m_CurrentTest; + std::vector<std::pair<std::string, std::function<Test*()>>> m_Tests; + }; }
新建 Test.cpp 实现方法:
1 2 3 4 5 6 7 8 9 10 11 12 13 14 15 16 17 18 19 20 21 #include "Test.h" #include "imgui/imgui.h" namespace test{ TestMenu::TestMenu (Test*& currentTestPointer) : m_CurrentTest (currentTestPointer) { } void TestMenu::OnImGuiRender () { for (auto & test : m_Tests) { if (ImGui::Button (test.first.c_str ())) m_CurrentTest = test.second (); } } }
应用类 1 2 3 4 5 6 7 8 9 10 11 12 13 14 15 16 17 18 19 20 21 22 23 24 25 26 27 28 29 30 31 32 33 34 35 36 37 38 39 40 41 42 43 44 45 46 47 48 49 50 51 52 53 54 55 56 57 58 59 60 61 62 63 64 65 66 67 68 69 70 71 72 73 74 75 76 77 78 79 80 81 82 83 84 85 86 87 88 89 90 91 92 93 94 95 96 97 98 99 100 101 102 103 104 105 106 107 108 109 110 111 112 113 114 115 116 117 118 119 120 121 122 123 #include <iostream> #include <fstream> #include <GL/glew.h> #include <GLFW/glfw3.h> #include "Renderer.h" #include "Shader.h" #include "imgui/imgui.h" #include "imgui/imgui_impl_glfw.h" #include "imgui/imgui_impl_opengl3.h" +#include "tests/Test.h" #include "tests/TestClearColor.h" int main() { /* Initialize the library */ if (!glfwInit()) return -1; glfwWindowHint(GLFW_CONTEXT_VERSION_MAJOR, 3); glfwWindowHint(GLFW_CONTEXT_VERSION_MINOR, 3); glfwWindowHint(GLFW_OPENGL_PROFILE, GLFW_OPENGL_CORE_PROFILE); /* Create a Windowed mode and its OpenGL context */ GLFWwindow* window = glfwCreateWindow(640, 480, "Hello World", nullptr, nullptr); if (!window) { GLCall(glfwTerminate()) return -1; } /* Make the window's context current */ glfwMakeContextCurrent(window); glfwSwapInterval(1); if (glewInit() != GLEW_OK) std::cout << "Error!" << std::endl; std::cout << glGetString(GL_VERSION) << std::endl; GLCall(glEnable(GL_BLEND)) GLCall(glBlendFunc(GL_SRC_ALPHA, GL_ONE_MINUS_SRC_ALPHA)) ImGui::CreateContext(); ImGui_ImplGlfw_InitForOpenGL(window, true); ImGui::StyleColorsDark(); const char* glsl_version = "#version 330"; ImGui_ImplOpenGL3_Init(glsl_version); + test::Test* currentTest = nullptr; + test::TestMenu* testMenu = new test::TestMenu(currentTest); + currentTest = testMenu; + testMenu->RegisterTest<test::TestClearColor>("Clear Color"); /* Loop until the user closes the window */ while (!glfwWindowShouldClose(window)) { /* Render here */ + GLCall(glClearColor(0.0f, 0.0f, 0.0f, 1.0f)); Renderer renderer; renderer.Clear(); ImGui_ImplOpenGL3_NewFrame(); ImGui_ImplGlfw_NewFrame(); ImGui::NewFrame(); + if (currentTest) + { + currentTest->OnUpdate(0.0f); + currentTest->OnRender(); + ImGui::Begin("ImGui-Test"); + + if (currentTest != testMenu && ImGui::Button("<-")) + { + delete currentTest; + currentTest = testMenu; + } + + + currentTest->OnImGuiRender(); + ImGui::End(); + } ImGui::Render(); ImGui_ImplOpenGL3_RenderDrawData(ImGui::GetDrawData()); /* Swap front and back buffers */ glfwSwapBuffers(window); /* Poll for and events */ glfwPollEvents(); } + delete currentTest; + if (currentTest != testMenu) + { + delete testMenu; + } ImGui_ImplOpenGL3_Shutdown(); ImGui_ImplGlfw_Shutdown(); ImGui::DestroyContext(); glfwDestroyWindow(window); glfwTerminate(); return 0; }
创建一个纹理测试
纹理测试类 新建纹理测试类 TestTexture2D.h 和 TestTexture2D.cpp。
1 2 3 4 5 6 7 8 9 10 11 12 13 14 15 16 17 18 19 20 21 22 23 24 25 26 27 28 29 30 31 32 #pragma once #include "Test.h" #include "VertexBuffer.h" #include "VertexBufferLayout.h" #include "Texture.h" #include <memory> namespace test{ class TestTexture2D : public Test { private : std::unique_ptr<VertexArray> m_VAO; std::unique_ptr<IndexBuffer> m_IndexBuffer; std::unique_ptr<VertexBuffer> m_VertexBuffer; std::unique_ptr<Shader> m_Shader; std::unique_ptr<Texture> m_Texture; glm::mat4 m_Proj, m_View; glm::vec3 m_TranslationA, m_TranslationB; public : TestTexture2D (); ~TestTexture2D () = default ; void OnUpdate (float deltaTime) override void OnRender () override void OnImGuiRender () override }; }
其实就是把之前 Application.cpp 清理的琐碎代码整合到一个抽象类中供测试菜单调用:
1 2 3 4 5 6 7 8 9 10 11 12 13 14 15 16 17 18 19 20 21 22 23 24 25 26 27 28 29 30 31 32 33 34 35 36 37 38 39 40 41 42 43 44 45 46 47 48 49 50 51 52 53 54 55 56 57 58 59 60 61 62 63 64 65 66 67 68 69 70 71 72 73 74 75 76 77 78 79 80 81 82 83 84 85 86 87 88 89 90 #include "TestTexture2D.h" #include "Renderer.h" #include "imgui/imgui.h" #include "glm/glm.hpp" #include "glm/gtc/matrix_transform.hpp" namespace test{ TestTexture2D::TestTexture2D () :m_Proj (glm::ortho (0.0f , 960.0f , 0.0f , 720.0f , -1.0f , 1.0f )), m_View (glm::translate (glm::mat4 (1.0f ), glm::vec3 (-100 , 0 , 0 ))), m_TranslationA (glm::vec3 (200 , 200 , 0 )), m_TranslationB (glm::vec3 (400 , 200 , 0 )) { float positions[] = { 100.0f , 100.0f , 0.0f , 0.0f , 200.0f , 100.0f , 1.0f , 0.0f , 200.0f , 200.0f , 1.0f , 1.0f , 100.0f , 200.0f , 0.0f , 1.0f }; unsigned int indices[] = { 0 , 1 , 2 , 2 , 3 , 0 }; GLCall (glEnable (GL_BLEND)) GLCall (glBlendFunc (GL_SRC_ALPHA, GL_ONE_MINUS_SRC_ALPHA)) m_VAO = std::make_unique <VertexArray>(); m_VertexBuffer = std::make_unique <VertexBuffer>(positions, static_cast <unsigned long long >(4 ) * 4 * sizeof (float )); VertexBufferLayout layout; layout.Push <float >(2 ); layout.Push <float >(2 ); m_VAO->AddBuffer (*m_VertexBuffer, layout); m_IndexBuffer = std::make_unique <IndexBuffer>(indices, 6 ); m_Shader = std::make_unique <Shader>("res/shader/Basic.shader" ); m_Shader->Bind (); m_Shader->SetUniform4f ("u_Color" , 0.2f , 0.3f , 0.8f , 1.0f ); m_Shader->SetUniform1i ("u_Texture" , 0 ); m_Texture = std::make_unique <Texture>("res/textures/Checkerboard.png" ); } void TestTexture2D::OnUpdate (float deltaTime) { } void TestTexture2D::OnRender () { GLCall (glClearColor (0.0f , 0.0f , 0.0f , 1.0f )) GLCall (glClear (GL_COLOR_BUFFER_BIT)) constexpr Renderer renderer; m_Texture->Bind (); { const glm::mat4 model = glm::translate (glm::mat4 (1.0f ), m_TranslationA); const glm::mat4 mvp = m_Proj * m_View * model; m_Shader->Bind (); m_Shader->SetUniformMat4f ("u_MVP" , mvp); renderer.Draw (*m_VAO, *m_IndexBuffer, *m_Shader); } { const glm::mat4 model = glm::translate (glm::mat4 (1.0f ), m_TranslationB); const glm::mat4 mvp = m_Proj * m_View * model; m_Shader->Bind (); m_Shader->SetUniformMat4f ("u_MVP" , mvp); renderer.Draw (*m_VAO, *m_IndexBuffer, *m_Shader); } } void TestTexture2D::OnImGuiRender () { ImGui::SliderFloat3 ("m_TranslationA" , &m_TranslationA.x, 0.0f , 960.0f ); ImGui::SliderFloat3 ("m_TranslationB" , &m_TranslationB.x, 0.0f , 960.0f ); ImGui::Text ("Application average %.3f ms/frame (%.1f FPS)" , static_cast <double >(1000.0f / ImGui::GetIO ().Framerate), static_cast <double >(ImGui::GetIO ().Framerate)); } }
应用类 1 2 3 4 5 6 7 8 9 10 11 12 13 14 15 16 17 18 19 20 21 22 23 24 25 26 27 28 29 30 31 32 33 34 35 36 37 38 39 40 41 42 43 44 45 46 47 48 49 50 51 52 53 54 55 56 57 58 59 60 #include <GL/glew.h> #include <GLFW/glfw3.h> #include "Renderer.h" #include "imgui/imgui.h" #include "imgui/imgui_impl_glfw.h" #include "imgui/imgui_impl_opengl3.h" #include "tests/TestClearColor.h" +#include "tests/TestTexture2D.h" int main() { /* Initialize the library */ if (!glfwInit()) return -1; glfwWindowHint(GLFW_CONTEXT_VERSION_MAJOR, 3); glfwWindowHint(GLFW_CONTEXT_VERSION_MINOR, 3); glfwWindowHint(GLFW_OPENGL_PROFILE, GLFW_OPENGL_CORE_PROFILE); /* Create a Windowed mode and its OpenGL context */ GLFWwindow* window = glfwCreateWindow(640, 480, "Hello World", nullptr, nullptr); if (!window) { GLCall(glfwTerminate()) return -1; } /* Make the window's context current */ glfwMakeContextCurrent(window); glfwSwapInterval(1); if (glewInit() != GLEW_OK) std::cout << "Error!" << std::endl; std::cout << glGetString(GL_VERSION) << std::endl; GLCall(glEnable(GL_BLEND)) GLCall(glBlendFunc(GL_SRC_ALPHA, GL_ONE_MINUS_SRC_ALPHA)) ImGui::CreateContext(); ImGui_ImplGlfw_InitForOpenGL(window, true); ImGui::StyleColorsDark(); const char* glsl_version = "#version 330"; ImGui_ImplOpenGL3_Init(glsl_version); test::Test* currentTest = nullptr; test::TestMenu* testMenu = new test::TestMenu(currentTest); currentTest = testMenu; testMenu->RegisterTest<test::TestClearColor>("Clear Color"); +
如何让统一变量更快 span
之前已经实现了将读取的统一变量位置存入缓存,不再赘述。
批渲染 简介
对于学习 OpenGL 或图形编程的人来说,你们可能听说过所谓的批处理或者批处理渲染,这是一种非常有用的渲染技术。批渲染本身很难精确地定义,因为它可以指很多不同地东西,它的复杂度从几分钟就能写完的简单东西到一个更大的系统部分。我们今天要具体讨论的是如何将几何图形批处理在一起,这意味着我们可以在独立的 DrawCall 中渲染多个几何图形,这也是批处理和批渲染对我的核心意义。
所以让我们把它分解一下,能够在单个 DrawCall 中渲染多个几何体是什么意思?为什么它有用,它是什么样子的。传统的说法我们已经绘制了很多,现在我们已经建立了一个顶点缓冲区、一个索引缓冲区,然后我们用类似 glDrawElements 的东西来做渲染,那就是我们的绘制,那就是我们在屏幕上看到东西的方式。如果我们想要一个不同的对线,或者想要另一个矩形出现在屏幕上,我们基本上就是重复这个过程。如果形状不变我们当然可以重用相同的顶点缓冲区和索引缓冲区,然后我们在顶点着色器中使用统一变量矩阵,能够真正定位和潜在地转换特定的几何图形,那是非常棒的。但是如果我们想要渲染大量的几何图形呢?
示例 2D游戏贴图绘制 让我们从一些例子开始,这样我们就能理解我们要做的是什么。例如我们正在制作一款自上而下的 2D-RPG 游戏,我们在世界各地移动,而世界本身是由不同的贴图组成的(像 Stardew Valley)。现在这些游戏在很多情况下确实显示了从上面看的视角并且相机可能变得很远,在我们当前的策略下,屏幕上很可能会出现许多不同的贴图。如果我们决定将每个贴图渲染为带有纹理的独立四边形,那有点困难,它将不会有很好的性能表现。因为如果我们有成百上千的贴图在世界中作为单独的 DrawCall 一个接一个的绘制,我们的 GPU 就跟不上了。
现在在现代硬件上,我们绝对可以侥幸通过数千次 DrawCall,这并不是什么大问题,但它绝对不是理想情况,尤其是对于像四边形这样简单的物体。如果你们单独绘制每个四边形,那是很低效的,当我们添加更多的四边形或者缩小相机,我们可以看到更多的地图时,我们的游戏可能会开始掉帧,因为它跟不上要绘制成千上万个贴图的速度。
粒子系统 我们要展示的另一个很好的例子是粒子系统。
在 Infinite 引擎中我制作了简单的粒子特效 ,包括像燃烧的粒子和烟熏的粒子之类的东西。现在我渲染这些粒子的方式仅仅是通过使用简单的变换单独的四边形,但是如果我们有成千上万个这样的粒子又会发生什么?这是一个巨大的粒子系统,即使在现代的硬件上也很难渲染,但是有一种简单的方法,或者说更有效的方法,那就是批处理或批处理渲染。
简而言之,批渲染意味着将所有几何图形批处理到一个独立顶点缓冲区和索引缓冲区,然后简单地绘制一次。我们把所有东西放在一起,就好像它是一个几何图形,然后我们只渲染一次。刚才描述的将所有场景批量处理在性能上的提升是巨大的。
批渲染测试类 test/ 新建批渲染测试类 TestBatchRender.h 和 TestBatchRender.cpp。
1 2 3 4 5 6 7 8 9 10 11 12 13 14 15 16 17 18 19 20 21 22 23 24 25 26 27 28 29 30 31 #pragma once #include "Test.h" #include "VertexBuffer.h" #include "VertexBufferLayout.h" #include <memory> namespace test{ class TestBatchRender : public Test { private : std::unique_ptr<VertexArray> m_VAO; std::unique_ptr<IndexBuffer> m_IndexBuffer; std::unique_ptr<VertexBuffer> m_VertexBuffer; std::unique_ptr<Shader> m_Shader; glm::mat4 m_Proj, m_View; glm::vec3 m_Translation; public : TestBatchRender (); ~TestBatchRender (); void OnUpdate (float deltaTime) override void OnRender () override void OnImGuiRender () override }; }
该测试类头文件包含顶点数组、索引缓冲区、顶点缓冲区、着色器以及 MVP 矩阵。
批处理着色器 新建着色器 batch.shader:
1 2 3 4 5 6 7 8 9 10 11 12 13 14 15 16 17 18 19 20 21 #shader vertex #version 330 core layout (location = 0 )in vec4 position;uniform mat4 u_MVP;void main(){ gl_Position = u_MVP * position; } #shader fragment #version 330 core layout (location = 0 )out vec4 color;void main(){ color = vec4 (1.0 f, 1.0 f, 1.0 f, 1.0 f); }
应用类 1 2 3 4 5 6 7 8 9 10 11 12 13 14 15 16 17 18 19 20 21 22 23 24 25 26 27 28 29 30 31 #include <GL/glew.h> #include <GLFW/glfw3.h> #include "Renderer.h" #include "imgui/imgui.h" #include "imgui/imgui_impl_glfw.h" #include "imgui/imgui_impl_opengl3.h" #include "tests/TestClearColor.h" #include "tests/TestTexture2D.h" +#include "tests/TestBatchRender.h" int main() { ...... test::Test* currentTest = nullptr; test::TestMenu* testMenu = new test::TestMenu(currentTest); currentTest = testMenu; testMenu->RegisterTest<test::TestClearColor>("Clear Color"); testMenu->RegisterTest<test::TestTexture2D>("2D Texture"); + testMenu->RegisterTest<test::TestBatchRender>("Batch Render"); /* Loop until the user closes the window */ while (!glfwWindowShouldClose(window)) { ......
颜色
让我们继续批处理渲染。
今天讲的都是颜色,我们如何绘制两个不同颜色的四边形或者任意数量的不同颜色的四边形。当我们想画一个有颜色的四边形时,最简单的方法是用顶点位置填充顶点缓冲区然后渲染那个四边形,再在片段着色器中传入一个包含颜色的统一变量。我们要做的就是使用两个不同的绘制调用用来渲染我们的矩形两次,然后在我们的片段着色器中有一个 color 设置输出颜色。
但我们不能那么做了,因为我们只有一个 DrawElement 调用,所以我们不能将统一变量设置为绘制之间的两个不同值。
目前我们的顶点只简单地包含一个位置,所以每个顶点都有三个浮点数 x、y、z,它定义了顶点的位置。但是位置并不是顶点能够包含的唯一内容,你们可以在顶点中存储任何东西然后在顶点着色器中访问这些数据。
着色器 1 2 3 4 5 6 7 8 9 10 11 12 13 14 15 16 17 18 19 20 21 22 23 24 25 26 27 28 #shader vertex #version 330 core layout(location = 0)in vec4 position; +layout(location = 2)in vec4 u_Color; +out vec4 v_Color; uniform mat4 u_MVP; void main() { gl_Position = u_MVP * position; + v_Color = u_Color; } #shader fragment #version 330 core layout(location = 0)out vec4 color; +in vec4 v_Color; void main() { - color = vec4(1.0f, 1.0f, 1.0f, 1.0f); + color = v_Color; }
批处理测试类 改变顶点属性声明:
1 2 3 4 5 6 7 8 9 10 11 12 13 14 15 16 17 18 19 20 21 22 23 24 25 26 27 28 29 30 31 32 33 34 35 36 m_Translation(glm::vec3(0, 0, 0)) { float positions[] = { - 100.0f, 100.0f, - 200.0f, 100.0f, - 200.0f, 200.0f, - 100.0f, 200.0f, + 100.0f, 100.0f, 0.0f, 0.0f, 1.0f, 0.0f, 0.0f, 1.0f, + 200.0f, 100.0f, 0.0f, 0.0f, 1.0f, 0.0f, 0.0f, 1.0f, + 200.0f, 200.0f, 0.0f, 0.0f, 1.0f, 0.0f, 0.0f, 1.0f, + 100.0f, 200.0f, 0.0f, 0.0f, 1.0f, 0.0f, 0.0f, 1.0f, - 300.0f, 100.0f, - 400.0f, 100.0f, - 400.0f, 200.0f, - 300.0f, 200.0f, + 300.0f, 100.0f, 0.0f, 0.0f, 0.0f, 1.0f, 0.0f, 1.0f, + 400.0f, 100.0f, 0.0f, 0.0f, 0.0f, 1.0f, 0.0f, 1.0f, + 400.0f, 200.0f, 0.0f, 0.0f, 0.0f, 1.0f, 0.0f, 1.0f, + 300.0f, 200.0f, 0.0f, 0.0f, 0.0f, 1.0f, 0.0f, 1.0f, }; ...... m_VAO = std::make_unique<VertexArray>(); - m_VertexBuffer = std::make_unique<VertexBuffer>(positions, 8 * 2 * sizeof(float)); + m_VertexBuffer = std::make_unique<VertexBuffer>(positions, 8 * 8 * sizeof(float)); VertexBufferLayout layout; + layout.Push<float>(2); layout.Push<float>(2); + layout.Push<float>(4); m_VAO->AddBuffer(*m_VertexBuffer, layout); m_IndexBuffer = std::make_unique<IndexBuffer>(indices, 12);
纹理
动态几何
索引
挑战一小时完成批渲染器